
Quick Answer
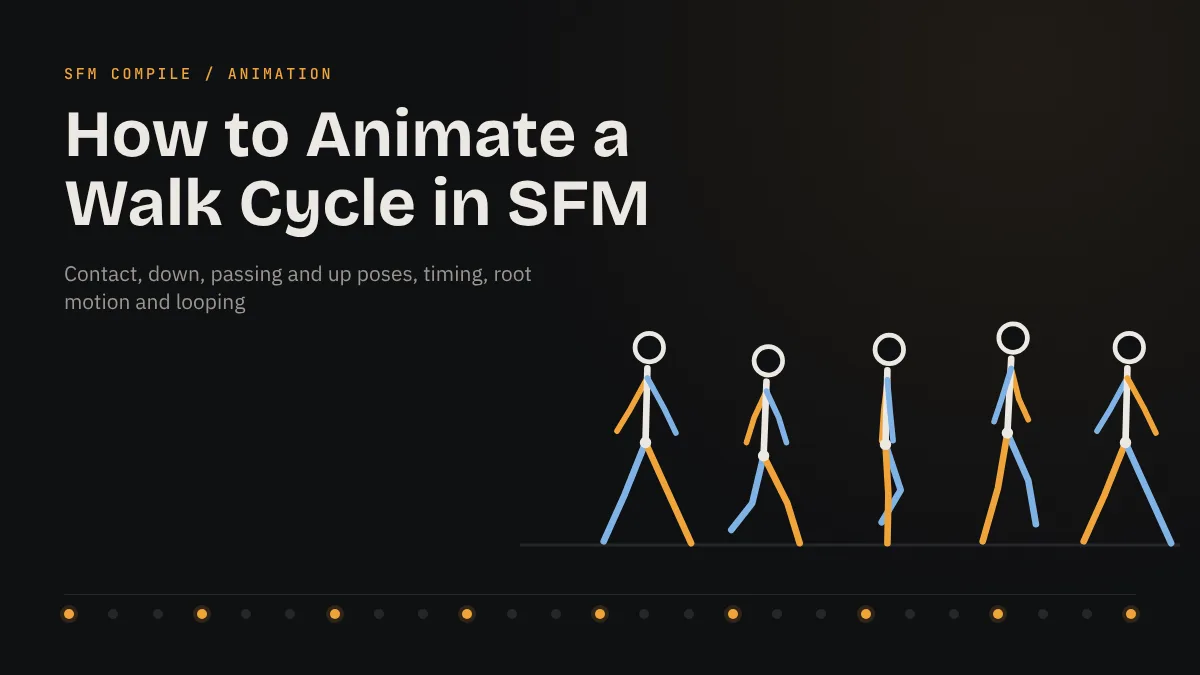
To animate an SFM walk cycle, add an IK rig to your character, then key four poses per step: contact, down, passing and up. Mirror them for the second step, move the root forward at a steady rate so the planted foot never slides, and smooth the curves in the Graph Editor. A step of around 12 frames at 24 fps gives a natural walk.
A walk cycle is the first real test of animation skill in Source Filmmaker. It looks simple, yet a walk exposes every weakness at once: stiff hips, floating feet, robotic arms and a body that glides instead of carrying weight. Get it right and your characters feel alive in every shot that needs them to move from one mark to another.
This guide walks through the full process in SFM, from rigging the legs and choosing your timing to keying the key poses, moving the character through the scene and cleaning up the motion. It assumes you already know how to load a model and scrub the timeline. If you have not installed the program yet, start with our guide on installing Source Filmmaker on Windows.
Rig the character with IK legs.
A biped rig lets you plant feet and move the hips independently.
Pick a cycle length.
Around 12 frames per step at 24 fps is a reliable starting point.
Key contact and passing poses.
These define the stride and the moment the legs cross.
Add down and up poses.
They give the walk its bounce and sense of weight.
Move the root forward and polish curves.
Keep planted feet locked, then smooth timing in the Graph Editor.
What an SFM Walk Cycle Is and How It Works
A walk cycle is a repeating sequence of poses that moves a character forward one step after another. One full cycle covers two steps, one with each foot, and ends in a pose that matches the start so it can repeat without a visible jump. In SFM you build that cycle with keyframes on the character’s animation set, the same way you animate any other motion.
The Four Key Poses of a Step
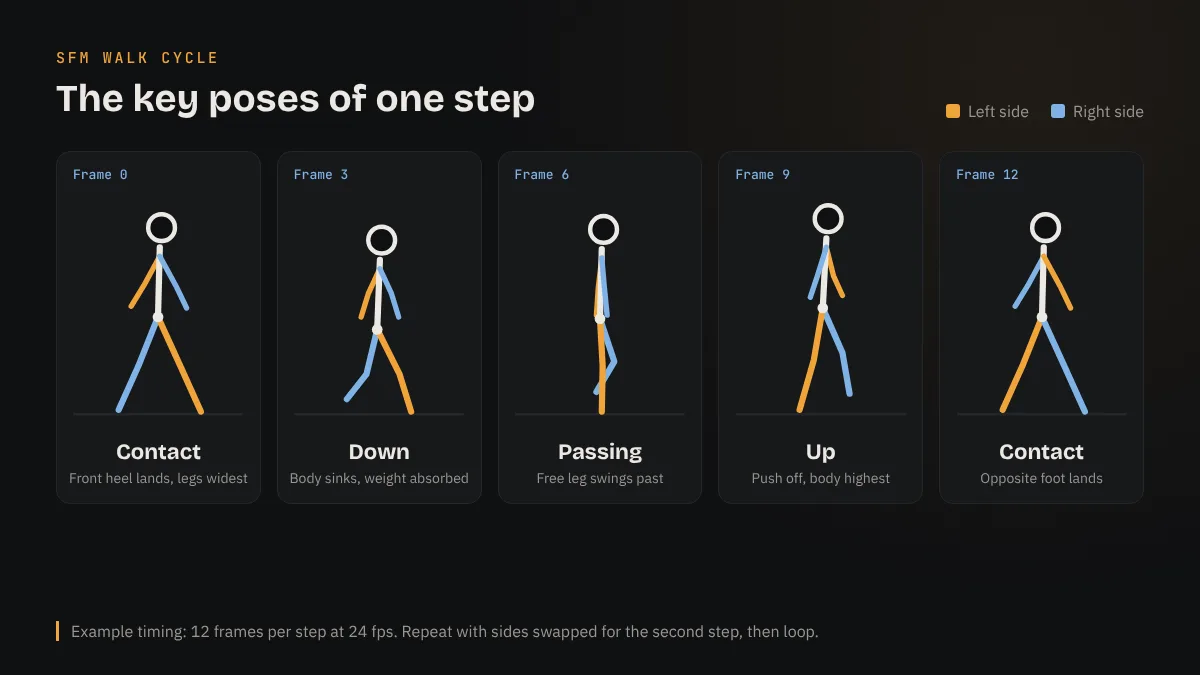
Every step breaks down into four classic poses. Animators have used this structure for decades, and it translates directly to SFM keyframes:
- Contact: the front heel touches the ground and the legs are at their widest spread.
- Down: the front leg bends to absorb weight and the body reaches its lowest point.
- Passing: the free leg swings past the standing leg, which is roughly straight under the hips.
- Up: the back foot pushes off and the body rises to its highest point before the next contact.
Hand-Keyed Walks vs Built-In Sequences
Many game models ship with their own walk and run animations, called sequences, stored inside the compiled model. SFM can bring a model’s sequence into an animation set, which gives you a quick walk with no keying at all. The trade-off is control: a game sequence is built for gameplay, so it may not match your timing, mood or camera angle. Hand keying takes longer but lets you shape every detail.
| Approach | Best for | Main limitation |
|---|---|---|
| Built-in model sequence | Background characters, quick previews | Fixed timing and style, not every model includes one |
| Hand-keyed walk with IK rig | Hero characters, close shots, stylized walks | Takes more time and practice |
| Sequence plus hand-keyed layer | Adding personality to a game walk | Dense keys can be harder to edit cleanly |
Prepare the Model and Scene Before You Key
Five minutes of setup saves an hour of fighting the rig later. Before you set a single key, make sure the model, the rig and the timing are ready.
Choose a Model With a Clean Skeleton
Pick a humanoid model with a standard biped skeleton: pelvis, spine, thighs, calves, feet and toes. Most official game characters and well-made Workshop models qualify. If you need to bring a model in first, our guide on importing models from the Steam Workshop covers the process. Place the character on flat ground in a simple map so you can judge foot contact clearly.
Add an IK Rig to the Legs
Animating a walk with raw bone rotations (forward kinematics) means every hip movement drags the feet with it, which causes sliding. An inverse kinematics rig solves that by letting you place the foot directly while the knee bends to follow. In SFM, right-click the animation set, open the Rig submenu and apply rig_biped_simple, which ships with the program. Our SFM rigging guide explains the controls it creates and how to fix a model that rigs poorly.
Set the Frame Rate and Cycle Length
SFM sessions run at 24 frames per second by default, and the timings below assume that rate. Decide on your step length before keying, because changing it later means sliding every key. The numbers are starting points used widely in animation, not fixed rules.
| Walk style | Frames per step | Frames per full cycle | Feel |
|---|---|---|---|
| Brisk walk | 10 | 20 | Purposeful, slightly hurried |
| Normal walk | 12 | 24 | Natural, relaxed pace |
| Slow walk | 16 | 32 | Tired, cautious or thoughtful |
| Very slow stroll | 20 or more | 40 or more | Heavy or sneaking |
Key the Contact and Passing Poses
Work pose to pose. Block the extremes first, check the rhythm, and only then add the in-between poses. The steps below use a 12-frame step, so one full cycle runs from frame 0 to frame 24.
Pose the First Contact on Frame 0
Move the left foot control forward and the right foot control back to set the stride length. Tilt the front foot so the heel touches first and the toes point slightly up, and roll the back foot onto its toes. Keep the hips centered between the feet. Lower the pelvis just enough that both legs can reach the ground without locking straight, since a fully straight IK leg tends to pop. Set keys on the feet, pelvis and spine.
Mirror the Contact on Frames 12 and 24
On frame 12, create the opposite contact: right foot forward, left foot back, with the same stride length. On frame 24, copy the frame 0 pose exactly. Matching the first and last frames is what lets the cycle loop. Scrub between the keys now. The motion will look like a stiff glide, which is expected at this stage.
Add the Passing Poses on Frames 6 and 18
At frame 6, the left leg stands roughly straight under the hips and carries the weight, while the right foot lifts and swings forward past it. Raise the free foot a few units off the ground and bend its knee. Frame 18 is the mirror: right leg standing, left leg passing. With contact and passing in place, the walk already reads as a walk, even without bounce.
Add Down and Up Poses for Weight
Down and up poses turn a mechanical stride into a body with mass. They mostly affect the pelvis height and the bend in the standing leg.
The Down Pose
Place the down pose around frame 3, a few frames after contact. The front foot is now flat on the ground, its knee bends to take the weight, and the pelvis drops to its lowest point in the step. The back foot peels off the ground. Repeat the mirrored version around frame 15.
The Up Pose
Put the up pose around frame 9. The standing foot rises onto its toes as it pushes off, the pelvis reaches its highest point, and the swinging leg reaches forward ready to land. Mirror it around frame 21. Keep the height change subtle: a few units of vertical travel is usually enough for a normal walk, while a bouncy cartoon walk can exaggerate it.
Hips, Shoulders and Arms
Real walks twist through the body. Rotate the pelvis so the hip on the side of the forward leg also moves forward, and rotate the chest the opposite way. Tilt the pelvis down toward the side of the swinging leg at the passing pose. Arms swing opposite to the legs: when the left leg is forward, the right arm is forward. Offset the arm keys by a frame or two after the body keys so the hands drag slightly behind, which reads as follow-through rather than stiffness.
Move the Character Forward and Loop the Cycle
You can animate the cycle in place and then move the whole character, or animate the forward travel directly. Either way, the planted foot must stay fixed on the ground while it carries weight.
Keep Planted Feet Locked
For a walk that travels through the scene, move the rig’s root and pelvis forward at a steady rate, and key each foot so it stays at the same world position from contact until it lifts off. With an IK rig this works naturally: the foot stays where you placed it and the knee bends as the body moves past. Stride distance and forward speed must match. If the body travels farther per step than the stride length, the planted foot will appear to slide.
Repeat the Cycle Across the Shot
Once one cycle looks right, copy its keys and paste them after frame 24, then offset the forward position so each new cycle starts where the previous one ended. Repeat until the character covers the distance the shot needs. Short shots often need only one or two cycles, and the camera can hide the start and end. Our Motion Editor and Graph Editor guide covers selecting, copying and offsetting keys in detail.
Starting From a Built-In Sequence
If the model includes a walk sequence, you can import it onto the animation set and treat it as a base. Check the result at full speed, then adjust the arms, head or posture with the Motion Editor to add personality. Look closely at root motion: some game sequences walk in place and expect the game to move the character, so you may still need to key forward travel yourself.
Polish the Walk and Fix Common Problems
Blocked poses only get you halfway. The polish pass is where a walk starts to feel natural, and it is also where most problems show up.
Smooth the Curves in the Graph Editor
Open the Graph Editor and look at the pelvis height curve. It should form a smooth wave with two dips per cycle, one for each down pose. The forward travel curve should be close to a straight, steady line for an even pace. Sharp corners where you did not expect them usually mean a stray key. Delete extra keys rather than adding more, since fewer keys give cleaner motion. Learning the editor’s keyboard shortcuts makes this pass much faster.
Troubleshooting Table
| Problem | Likely cause | Fix |
|---|---|---|
| Feet slide on the ground | Body speed does not match stride length | Adjust root travel per step or widen the stride |
| Knees pop or snap straight | Pelvis too high for the IK legs to reach | Lower the pelvis slightly across the whole cycle |
| Walk looks robotic | All body parts keyed on the same frames | Offset arm, head and spine keys by one or two frames |
| Visible hitch at the loop | First and last frames do not match | Copy the frame 0 pose onto the final frame exactly |
| Character floats | Little or no vertical motion in the pelvis | Strengthen the down and up poses |
| Feet go through the floor | Interpolation dips between keys | Add a key or flatten the curve during contact |
Review Before Rendering
Watch the walk from the side, the front and from the final camera angle. A side view reveals foot sliding, while a front view shows whether the hips sway too much or not at all. Play it at full speed, because problems that seem large while scrubbing often vanish in real time, and some only appear at speed. Valve’s Source Filmmaker documentation on the Valve Developer Community is a useful reference for the animation tools themselves.
Frequently Asked Questions
How many frames should an SFM walk cycle be?
At 24 fps, a normal walk uses about 12 frames per step, or 24 frames for a full two-step cycle. Use fewer frames for a brisk walk and more for a slow or heavy one.
Do I need an IK rig to animate walking in SFM?
It is not strictly required, but it makes walking far easier. Without IK, moving the hips moves the feet too, so keeping feet planted becomes a constant fight. The included rig_biped_simple script handles most humanoid models.
Why do my character’s feet slide during the walk?
Foot sliding happens when the body moves forward faster or slower than the stride allows. Lock each planted foot at a fixed position until it lifts, and match the root’s travel per step to the distance between the feet.
Can I use a model’s built-in walk animation in SFM?
Yes, if the model includes a walk sequence. You can import it onto the animation set and edit it. Not every model has one, and game sequences often walk in place, so you may still need to add forward movement.
How do I make a run cycle instead of a walk?
A run uses the same pose structure with shorter timing, often around 6 to 8 frames per step, a longer stride and a moment where both feet leave the ground. Lean the body forward and exaggerate the up and down motion.
How do I loop a walk cycle smoothly?
Make the last frame of the cycle identical to the first, then copy and paste the cycle’s keys along the timeline. Offset the forward position each time so the character keeps moving instead of snapping back.
Final Thoughts
Practice the Cycle, Then Add Character
A solid SFM walk cycle comes from a clear process: rig the legs with IK, block contact and passing poses, add down and up poses for weight, lock the planted feet and polish the curves. Build a plain, neutral walk first. Once it loops cleanly, change the posture, timing and arm swing to give each character their own way of moving. When the motion looks right from every angle, you are ready to render your SFM shot to MP4 and share it.