
Quick Answer
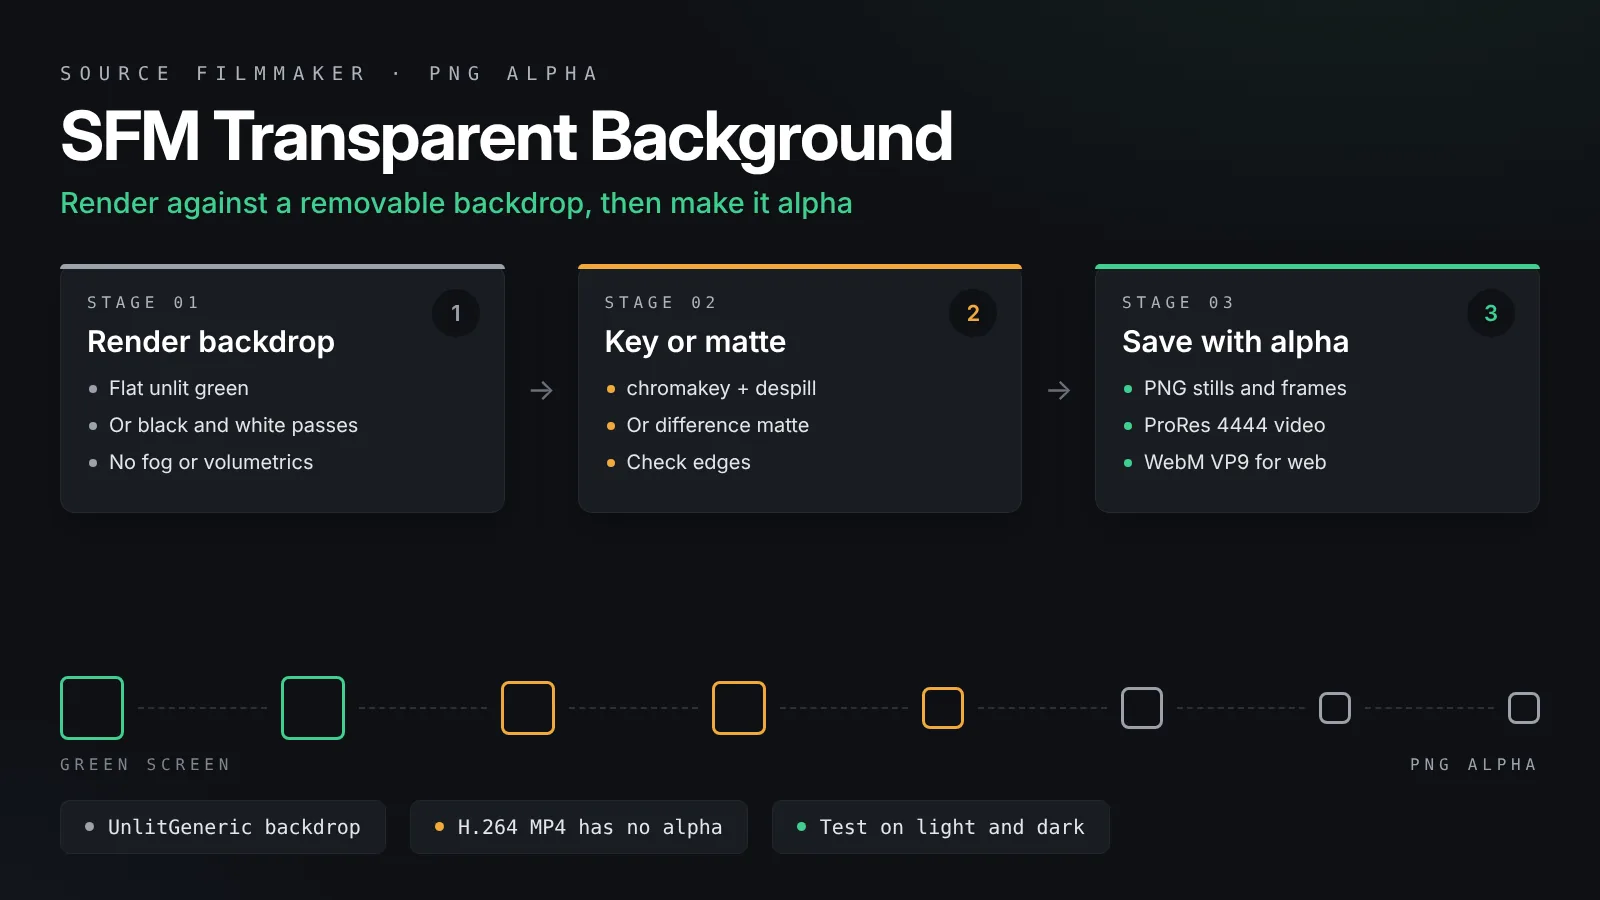
To get an SFM transparent background, render the subject against a flat green backdrop and key it out, or render the same frame on pure black and pure white and build a difference matte. SFM has no dependable alpha output. Save stills as PNG with alpha, and videos as ProRes 4444 or WebM with alpha.
A character on a transparent background is useful everywhere: thumbnails, overlays, stream alerts, composites and posters with custom backgrounds. Source Filmmaker, however, does not give you a dependable alpha channel straight from its exporters. The good news is that you can still get a clean SFM transparent background with a little setup. This guide shows two methods that work, explains when to use each, and covers how to save the result as PNG with alpha or as a video format that keeps transparency.
Both methods follow the same idea. You render the subject against a background that is easy to remove, then a second program turns that background into transparency.
The short version:
Render the subject against an even, flat green backdrop, or render the same frame twice on pure black and pure white backdrops.
For green screen frames, remove the green with a keyer such as FFmpeg chromakey plus despill, GIMP or a compositor.
For black and white passes, build a difference matte, which gives clean, soft edges even on hair and blur.
Save stills as PNG, image sequences as PNG frames, and videos as ProRes 4444 or WebM with alpha.
Why SFM Needs a Workaround
It helps to know what SFM can and cannot do before you set up a shot.
No dependable alpha output
SFM’s exporters are built to produce finished frames, not layers. The poster exporter and image sequence exports save the full frame, background included. Our SFM poster tutorial covers those exporters in detail. To isolate a character, you need to create the transparency yourself.
Two reliable methods
The first method is the classic green screen: a flat, brightly colored background that a keyer can remove. It is quick and works for most shots. The second method is a difference matte. You render the same frame on a black backdrop and on a white backdrop, and the difference between them reveals exactly how transparent each pixel is. It takes two renders, but it produces cleaner edges.
| Method | Renders needed | Edge quality | Best for |
|---|---|---|---|
| Green screen key | One | Good, needs spill cleanup | Animations, quick work, simple edges |
| Black and white difference matte | Two, identical | Excellent, keeps soft edges | Posters, hair, glass, motion blur |

Method 1: The Green Screen Setup
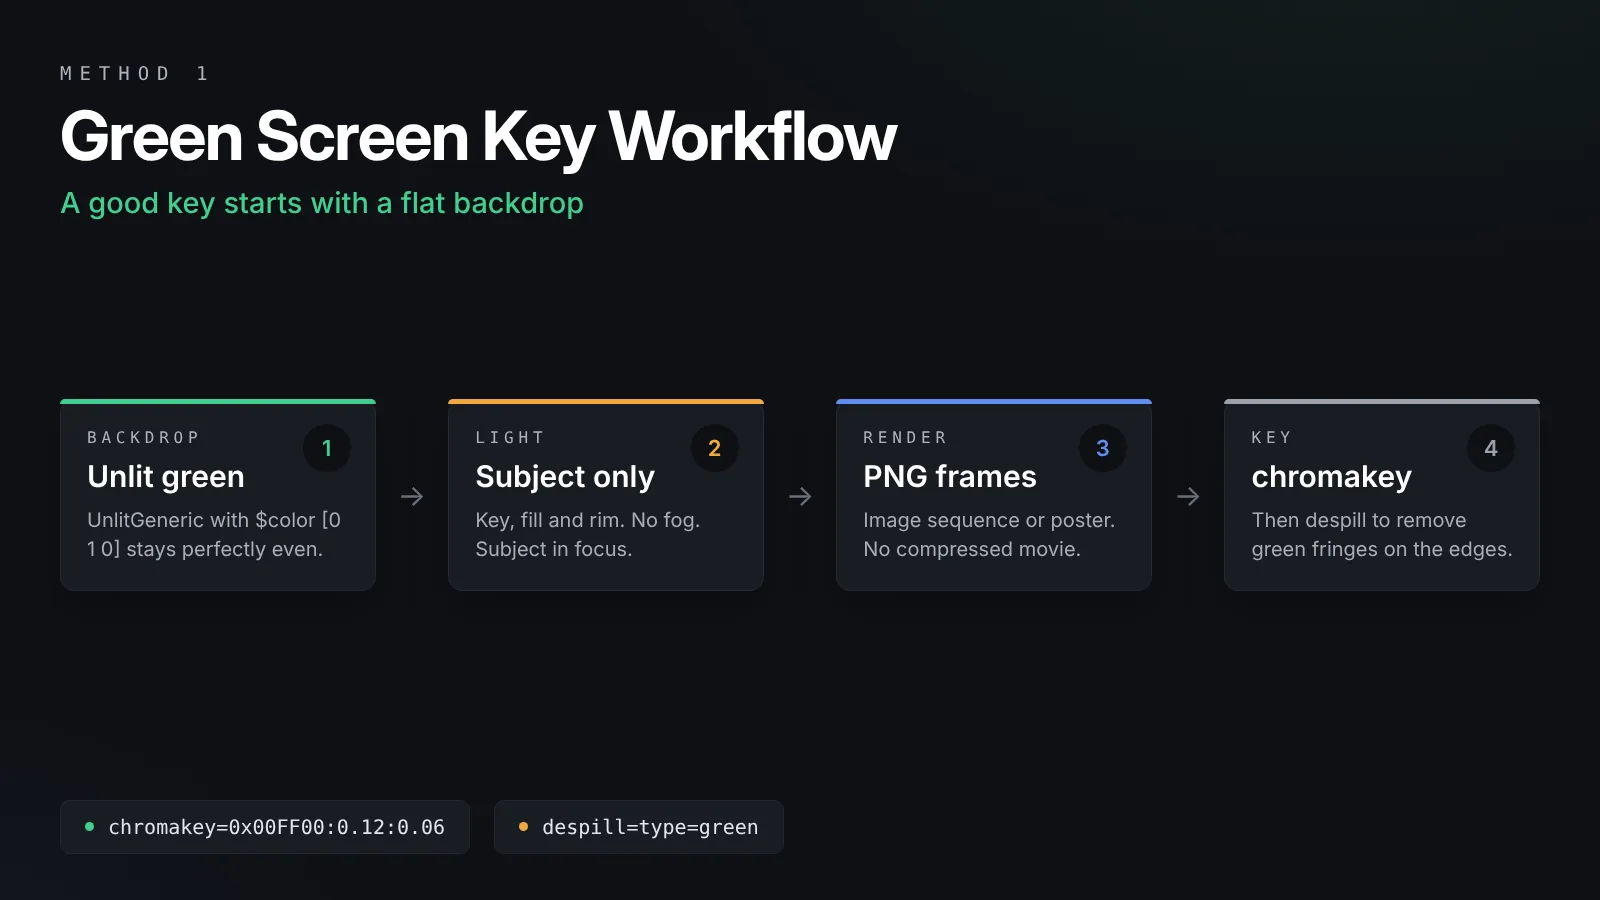
A good key starts with a good backdrop, not with the keyer.
Get a flat backdrop
The easiest option is a green screen map from the SFM Steam Workshop, which gives you a room or plane in a flat color. You can also place a large flat prop behind the subject and give it a bright, even material. If you compile your own backdrop prop, an unlit material keeps its color flat no matter how you light the scene:
"UnlitGeneric"
{
	"$basetexture" "vgui/white"
	"$color" "[0 1 0]"
}
UnlitGeneric ignores lights, so the backdrop stays one even green. The $color line tints a plain white texture to pure green.
Pick a color that is not in your subject
Green is standard, but it fails if your character wears green or has green effects. Switch to blue or magenta for those shots by changing the $color values. The backdrop color must not appear anywhere on the subject.
Light the subject, not the backdrop
Light the character as you normally would, with a key, fill and rim. Keep the subject a few units in front of the backdrop so shadows do not fall on it. Turn off fog and volumetric lights for this shot, because haze in front of the backdrop tints the key color and makes it uneven. Our SFM lighting guide covers rim lights, which help separate the subject from the screen.
Keep edges keyable
Fast motion blur and shallow depth of field turn edges into a mix of subject and green, which keyers struggle with. Keep the subject in focus, use moderate motion blur and leave anti-aliasing on. Our guide to the best SFM render settings explains how those samples affect the edges.
Render frames
Export as a PNG or TGA image sequence for animation, or as a poster for a still. Avoid compressed movie exports, because compression smears the green into the edges.
Keying the Green Screen
Now remove the green and turn it into transparency.
With FFmpeg
FFmpeg can key a whole image sequence in one command and save PNG files with alpha:
ffmpeg -i shot_%04d.png -vf "chromakey=0x00FF00:0.12:0.06,despill=type=green" -c:v png keyed_%04d.pngThe first number after the color is the similarity, which controls how close to green a pixel must be to disappear. The second is the blend, which softens the edge. Start with small values, check a frame, and raise them a little at a time. The despill filter removes green fringes from the edges. The FFmpeg filters documentation explains every option for chromakey and despill.
With GIMP or Photoshop
For a single poster, open the image and use Color to Alpha in GIMP, or Select, Color Range in Photoshop, then delete or mask the selection. Clean up the edges with a small feather and a hue and saturation adjustment to remove any green tint.
With a compositor
DaVinci Resolve and Blender’s compositor both include proper keyers with spill suppression and edge controls. They are worth learning if you key long animations often.
Method 2: The Black and White Difference Matte
This method gives the cleanest transparency SFM can produce.
How it works
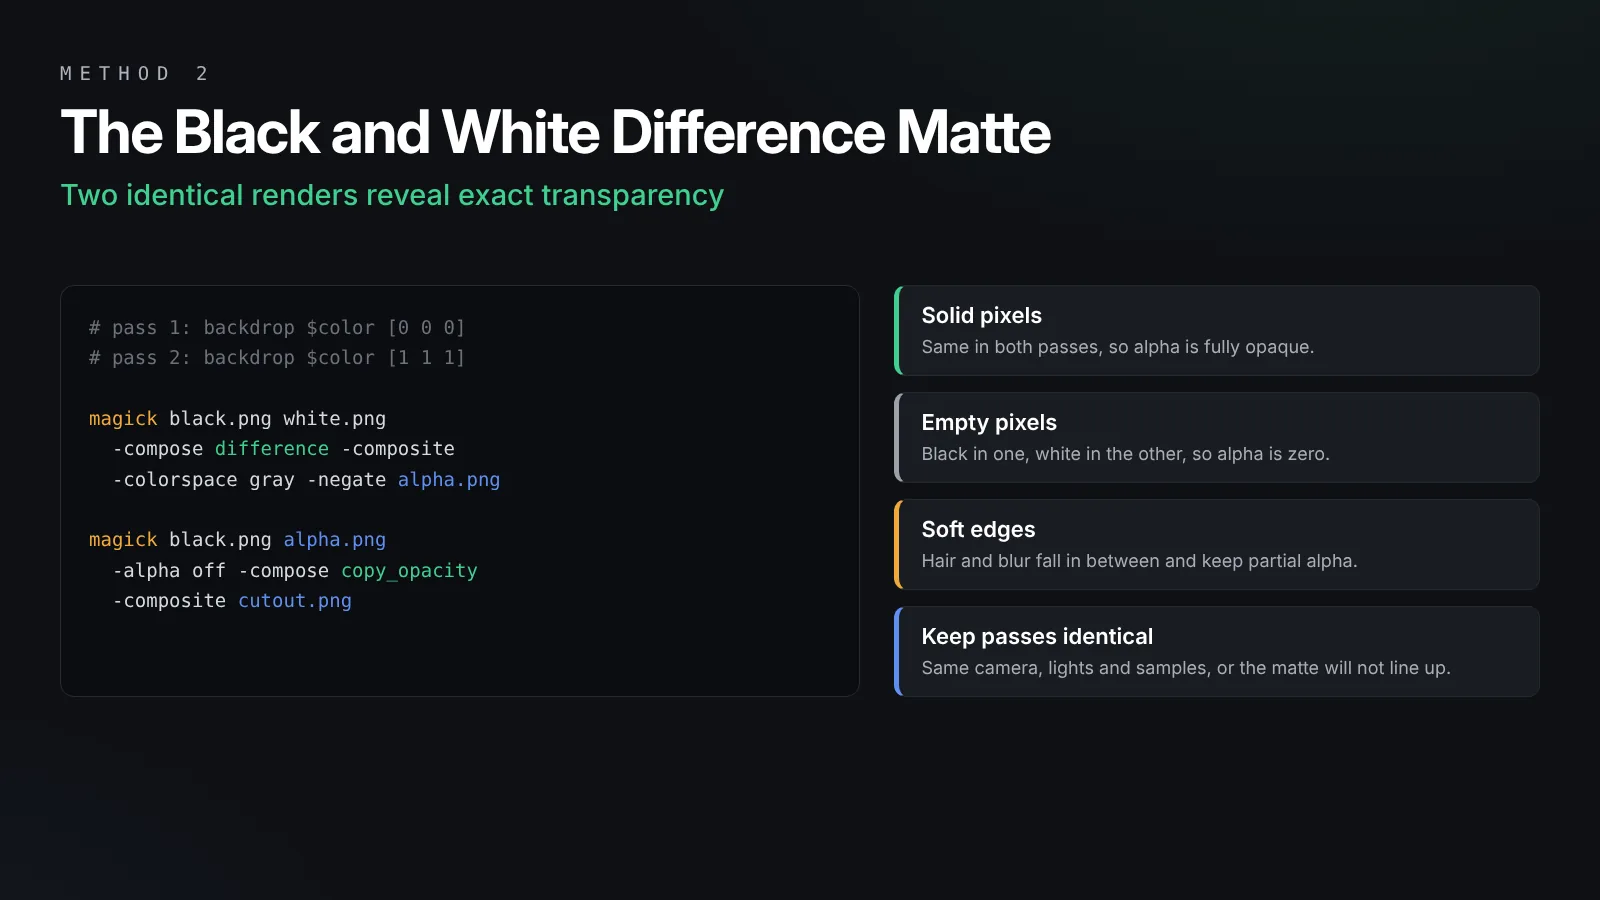
Render the exact same frame twice. The first time, the backdrop is pure black. The second time, it is pure white. Where the subject is solid, both renders match. Where the subject is fully missing, one render shows black and the other shows white. Partly transparent pixels, such as soft hair edges and motion blur, sit somewhere in between. The difference between the two renders measures exactly how see-through each pixel is.
Set up the two passes
Use the unlit backdrop material from earlier, with $color set to [0 0 0] for the black pass and [1 1 1] for the white pass. Change nothing else between the two renders: not the camera, not the lights, not the samples. Because the backdrop is unlit and SFM does not bounce light between surfaces, the subject looks the same in both passes.
Build the matte with ImageMagick
For stills, ImageMagick turns the two renders into a cutout:
magick black.png white.png -compose difference -composite -colorspace gray -negate alpha.png
magick black.png alpha.png -alpha off -compose copy_opacity -composite cutout.png
The first command makes the alpha matte: white where the subject is solid and black where it is missing. The second applies that matte to the black pass. Because the color comes from the black pass, very soft edges can look a little dark. For perfect edges, divide the color by the alpha in a compositor, a step often called unpremultiplying.
When to use it
Use the difference matte for posters, hero shots, characters with fine hair and anything with glass or soft blur. It needs two renders, so it doubles render time, but for a final image the edge quality is worth it.
Saving Files That Keep Transparency
The last step is choosing a format that actually stores alpha.
Stills and frame sequences
PNG is the safest choice for both. It stores a full alpha channel, it is lossless and it opens in every editor. TGA also supports alpha if your other software prefers it.
Video with alpha
Standard MP4 with H.264 does not store transparency. For editing, use ProRes 4444 in a MOV file. For the web, use WebM with VP9:
ffmpeg -framerate 24 -i keyed_%04d.png -c:v prores_ks -profile:v 4444 -pix_fmt yuva444p10le overlay.mov
ffmpeg -framerate 24 -i keyed_%04d.png -c:v libvpx-vp9 -pix_fmt yuva420p overlay.webm
Both keep the alpha channel from your PNG frames. If you only need a normal video, our guide to rendering SFM to MP4 covers encoding without transparency.
Check the result
Place the finished image or video over a bright color and over a dark color. Edges that look fine on one often show halos on the other. If you see a green rim, raise despill or tighten the key. If you see a dark rim on a difference matte, unpremultiply the color.
Troubleshooting Transparent Renders
Most problems trace back to the backdrop or the edges.
| Problem | Likely cause | Fix |
|---|---|---|
| Green fringe around the subject | Spill on the edges | Add despill or a hue correction on the edges |
| Holes in the character | Backdrop color appears on the subject | Switch to blue or magenta, or lower similarity |
| Patchy background left behind | Uneven backdrop or fog | Use an unlit backdrop and disable fog and volumetrics |
| Hair looks chopped and hard | Key too strong on fine detail | Use the difference matte method |
| Matte does not line up | Something changed between passes | Keep camera, lights and samples identical |
| Transparency lost in the video | Exported as H.264 MP4 | Use ProRes 4444 or WebM VP9 with alpha |
Frequently Asked Questions
Can SFM export a PNG with a transparent background directly?
Not dependably. SFM’s exporters save the full frame including the background. To get transparency, render against a green screen or on black and white backdrops, then remove the background in another program and save the result as PNG.
Which is better, green screen or a difference matte?
Green screen is faster because it needs one render, and it suits most animations. The difference matte needs two identical renders but gives cleaner edges on hair, blur and glass, so it is the better choice for posters.
What color backdrop should I use?
Use pure green unless your subject contains green. For green characters or effects, use blue or magenta. Whatever you pick, it must not appear anywhere on the subject.
Why does my keyed SFM render have a green outline?
Light and blur mix the backdrop color into the subject’s edges. Add a despill step, such as FFmpeg’s despill filter, or reduce green on the edges with a hue adjustment. A strong rim light also helps separate the subject.
Which video formats keep transparency?
ProRes 4444 in a MOV file and WebM with VP9 both store an alpha channel. A PNG image sequence also keeps it. Standard H.264 MP4 does not support transparency.
Does motion blur work with a transparent background?
Yes, but it makes keying harder because blurred edges mix with the backdrop. Keep blur moderate for green screen shots, or use the black and white difference matte, which captures soft blur accurately.
Final Thoughts
Pick the method that fits the shot
An SFM transparent background takes a little extra work, but it is reliable once you have a routine. For quick animations, use a flat unlit green backdrop, key it with chromakey and despill, and save PNG frames. For posters and fine hair, render on black and on white and build a difference matte. Save stills as PNG and videos as ProRes 4444 or WebM, and always check the edges on both light and dark backgrounds.