
Quick Answer
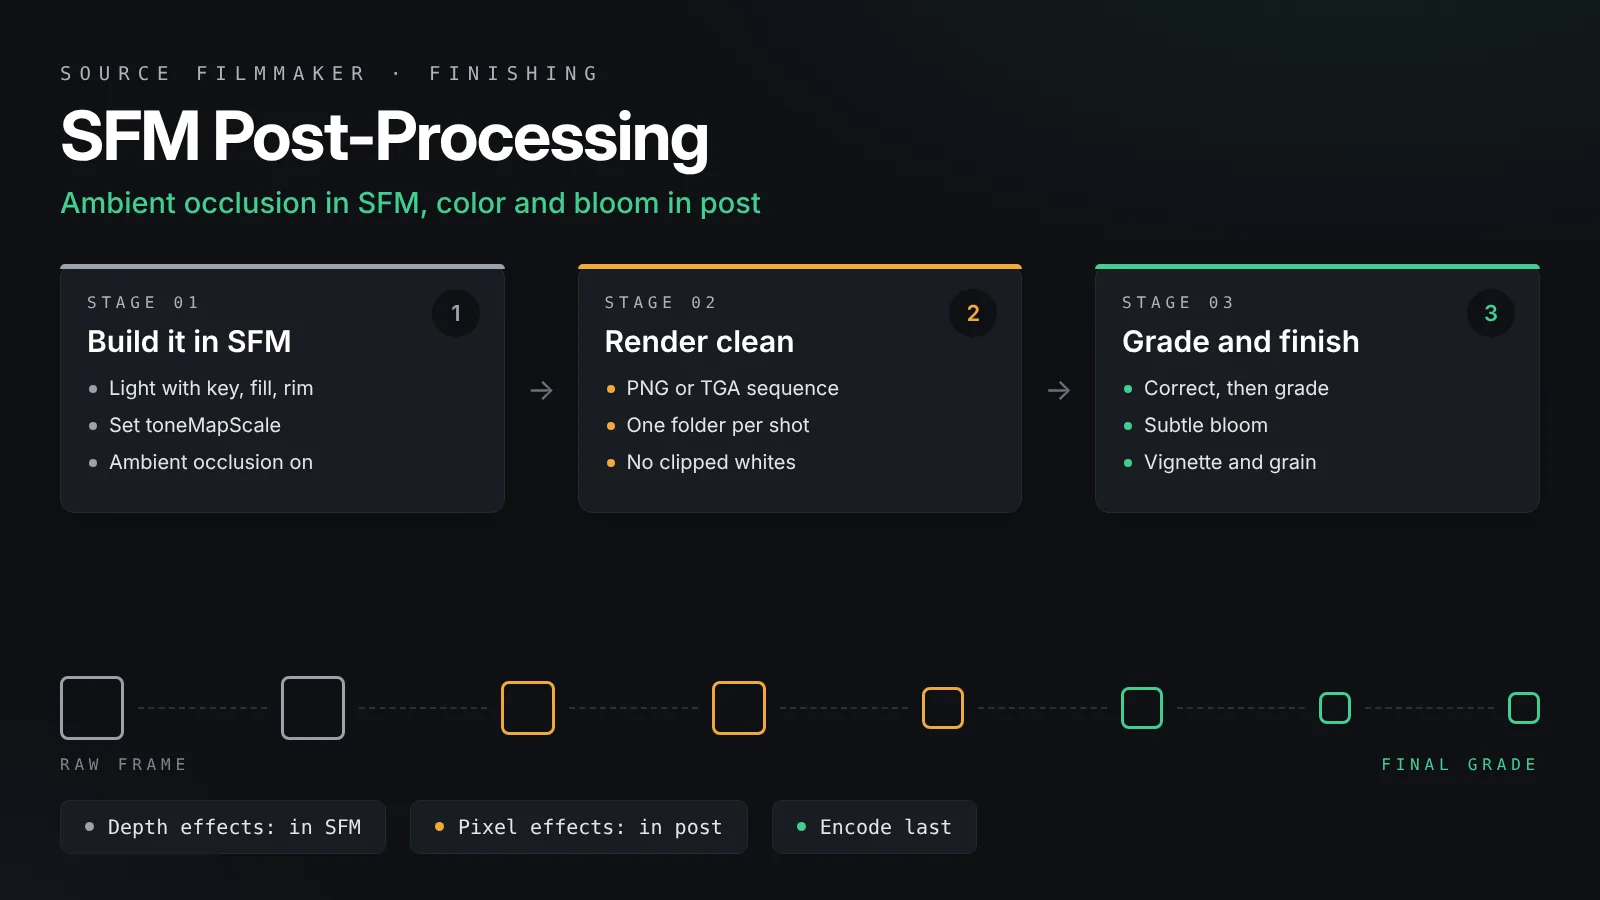
SFM post-processing works best as a split job. Handle depth-based effects such as ambient occlusion, depth of field and motion blur inside SFM, then render a PNG or TGA image sequence. Finish in a grading tool: correct exposure and white balance first, then add a look, a subtle bloom, a light vignette and grain.
A raw Source Filmmaker render can look flat next to the polished shorts you see online. The gap is usually not the models or the animation. It is the finishing work: soft contact shadows, a controlled glow on bright lights and a color grade that ties every shot together. This guide covers SFM post-processing from start to finish. You will learn what to set inside SFM, how to render frames that grade well, and how to add color correction, bloom and other finishing touches with free tools.
The approach is simple. Get the image as right as you can in SFM, export it cleanly, then finish it in a program built for grading.
The short version:
Light the scene well, set the camera’s toneMapScale, and turn on ambient occlusion in Render Settings for final renders.
Render an image sequence in PNG or TGA, not a compressed movie, so you have clean frames to grade.
Correct first: fix exposure, white balance and contrast so every shot matches.
Grade and finish: add a look, a subtle bloom on bright areas, a light vignette and grain, then encode the final video.
What SFM Post-Processing Means
Post-processing is everything that changes the image after the 3D scene is drawn.
In-engine effects
Some effects happen inside SFM while it renders. Ambient occlusion, depth of field and motion blur are all built into the render, and they depend on the scene’s depth and geometry. That makes them hard to add later, so set them up inside SFM. Our guide to the best SFM render settings explains how sampling affects each of them.
External finishing
Color correction, bloom, vignettes and film grain work on the finished pixels. You can do them in a grading tool after export, where you get proper controls, previews and undo. This also keeps your SFM session simple and your renders reusable.
Why split the work
SFM’s viewport can show some post effects, but the high quality exporters do not always carry them through. Doing the grade outside SFM means you know exactly what ends up in the final file. It also lets you change the look later without rendering the whole film again.
| Effect | Best done in | Why |
|---|---|---|
| Ambient occlusion | SFM | Needs scene depth and geometry |
| Depth of field and motion blur | SFM | Needs camera, depth and motion data |
| Exposure and contrast | Both | Light well in SFM, fine-tune in post |
| Color correction and grading | Post | Better tools and easy changes |
| Bloom and glow | Post | Precise control over threshold and size |
| Vignette and film grain | Post | Simple, adjustable finishing touches |

Getting the Image Right Inside SFM
Every grade works better when the source frames are strong.
Light first, grade second
A grade cannot invent light that was never there. Shape your subject with a key light, a fill and a rim light, and keep the background slightly darker than the face. Our SFM lighting guide covers three-point setups and volumetric lights in detail.
Control exposure with toneMapScale
SFM scenes use the map’s baked lighting, and your lights add to it. To bring the overall level down, select the camera’s animation set and lower its toneMapScale slider. A slightly dark, balanced frame grades better than a bright one with clipped highlights, because you cannot recover detail that is pure white.
Avoid clipped whites and crushed blacks
Look at the brightest and darkest parts of the frame. If a face or a window turns flat white, lower the light or the tone map scale. If shadows turn solid black with no detail, add a soft fill. Leave a little room at both ends so the grade has something to work with.
Ambient Occlusion in SFM
Ambient occlusion is the one effect you should almost always add in SFM.
What it does
Ambient occlusion darkens areas where surfaces meet or sit close together, such as under a chin, in the folds of clothing and where feet touch the floor. It makes characters feel grounded in the scene instead of floating on top of it.
Turning it on
Right-click the viewport and open Render Settings, then enable ambient occlusion. Check the same setting in the export dialog before you render, so the viewport and the export agree. Turn it off while you light and animate, since it slows the preview, and turn it back on for the final render.
Keeping it clean
SFM’s ambient occlusion works in screen space, so it can add dark halos around characters against a distant background. It also relies on sampling, so low sample counts can look grainy. Raise depth of field samples for final renders and check a few frames at full size. If halos still show, a slightly brighter fill light on the background often hides them.
Do not overdo it
Strong occlusion makes every scene look dirty. You want a soft hint of contact shadow, not black outlines. Compare a frame with it on and off, and if the difference shouts at you, it is too strong for the look.
Rendering Frames That Grade Well
The export format decides how far you can push the grade.
Use an image sequence
Export as a PNG or TGA image sequence instead of a compressed movie. Each frame is saved without lossy compression, so colors stay clean when you push them. A crash also costs you only the frames that did not finish. Our guide on turning SFM image sequences into MP4 shows how to number the frames and encode them later.
Keep one look across shots
Render every shot with the same tone map scale approach and similar lighting levels. Grading is fastest when shots already sit close together. A dark shot next to a bright one forces large changes, and large changes show banding and noise.
Name and organize
Give each shot its own folder, such as shot010, shot020 and so on, with frames named shot010_0001.png. Grading tools and FFmpeg read numbered sequences easily, and clear names stop you from mixing frames by mistake.
Color Correction and Grading
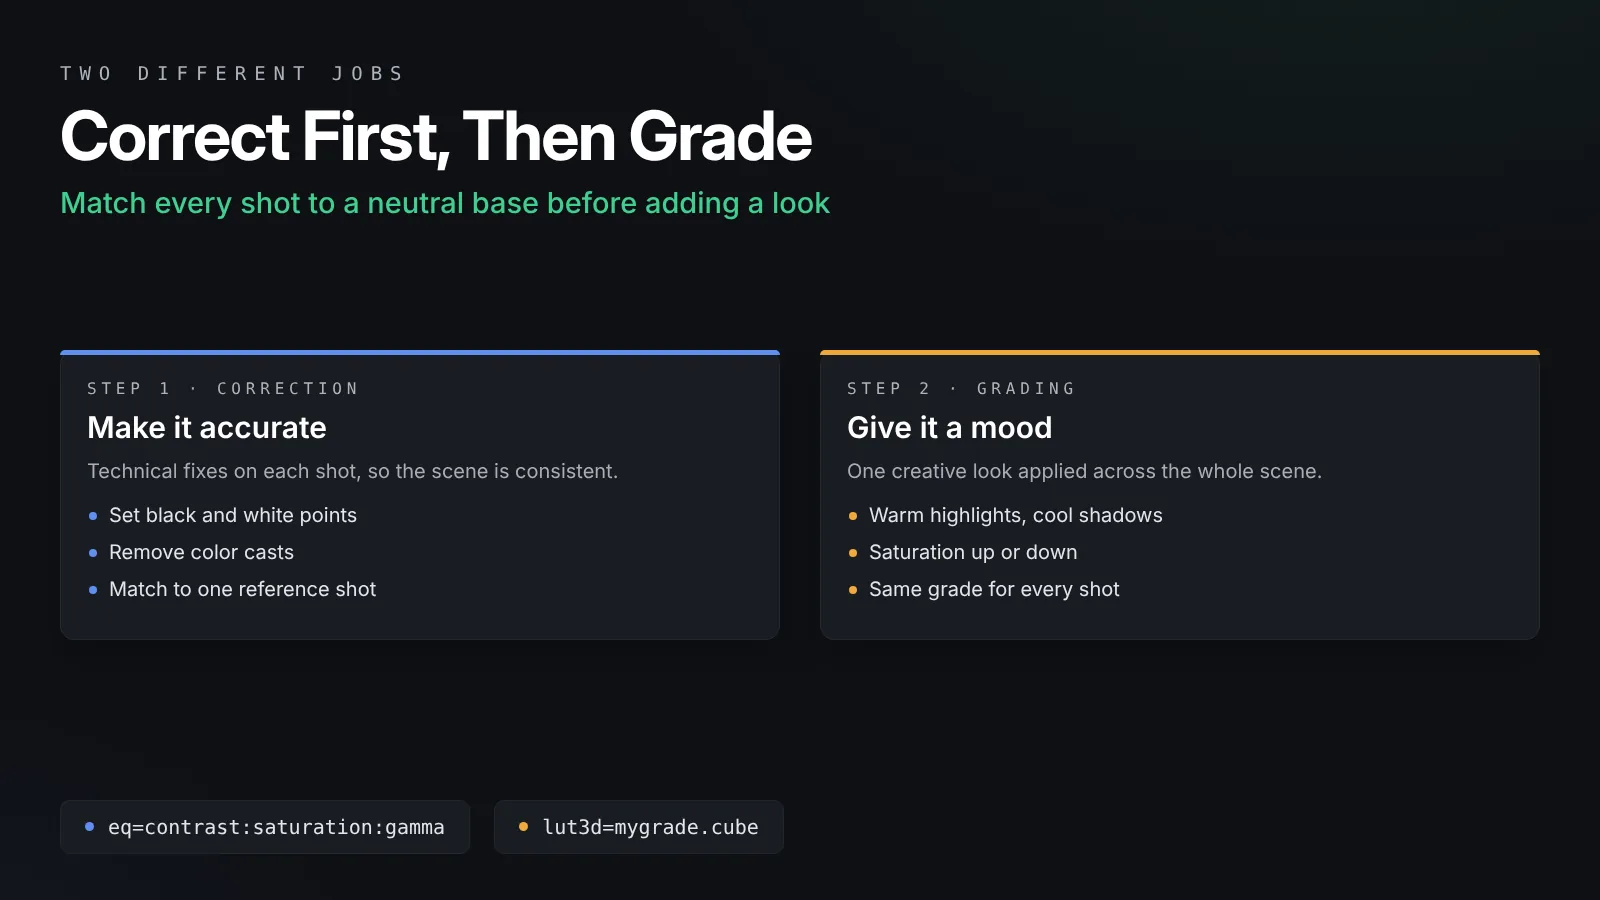
Correction makes shots accurate and consistent. Grading gives them a mood.
Step 1: Correct
Start with the basics on each shot. Set the black point so the darkest areas sit near black without crushing detail. Set the white point so highlights are bright but not clipped. Then remove any color cast, so neutral grays look gray. Match all shots in a scene to one reference shot before you add any style.
Step 2: Grade
Now add the look. Warm highlights with cool shadows is a classic cinematic style. A slight drop in saturation can make a scene feel serious, while extra saturation suits cartoon styles like Team Fortress 2. Apply the same grade to every shot in a scene, and only adjust shots that stand out.
Tools that work well
DaVinci Resolve is a free, full grading suite with color wheels, curves and scopes, and you can download it from the Blackmagic Design DaVinci Resolve page. Blender’s compositor is also free and handles image sequences well. For single posters, GIMP or Photoshop curves and levels are enough.
Quick grading with FFmpeg
If you just need a small adjustment, FFmpeg can apply it while encoding. This example lifts contrast and saturation slightly:
ffmpeg -framerate 24 -i shot010_%04d.png -vf "eq=contrast=1.08:saturation=1.1:gamma=0.97" -c:v libx264 -crf 16 -pix_fmt yuv420p shot010_graded.mp4You can also apply a LUT you built in another program with the lut3d filter, for example -vf “lut3d=mygrade.cube”. The FFmpeg filters documentation lists every option for eq, lut3d and vignette.
Adding Bloom the Right Way
Bloom is the soft glow that spreads around very bright areas.
Where bloom helps
Bloom sells bright light sources: muzzle flashes, neon signs, sunlit windows, glowing eyes and sparks. It also softens harsh highlights on metal. Used lightly, it adds a filmic feel. Used heavily, it makes everything look hazy and cheap.
Threshold, size and strength
Every bloom tool has three key controls. The threshold decides how bright a pixel must be before it glows. Size, or radius, decides how far the glow spreads. Strength, or mix, decides how visible it is. Start with a high threshold so only the brightest areas glow, a medium size and a low strength. Raise strength slowly until the light sources feel bright without washing out the frame.
Bloom in free tools
In Blender’s compositor, add a Glare node and set its type to Bloom or Fog Glow, then adjust the threshold and mix. GIMP has a Bloom filter under Filters, Light and Shadow. Resolve users can use its glow effects where their version offers them, or build a glow with a blurred copy of the highlights blended on top.
Bloom and particles
If your scene uses fire, sparks or muzzle flashes, bloom makes them feel hot and bright. Our SFM particles and effects guide shows how to set those effects up before you add glow in post.

Finishing Touches
A few small effects complete the look.
Vignette
A gentle darkening toward the corners pulls the eye to the center. Keep it subtle enough that viewers feel it rather than see it. FFmpeg’s vignette filter, Resolve’s vignette tools and a simple radial mask in Blender all work.
Film grain
A light layer of grain hides banding in smooth gradients, such as skies and fog, and makes CG frames feel less sterile. Add it last, after the grade, and keep it fine.
Sharpening
SFM renders with high sample counts can look a little soft. A small amount of sharpening on export helps on web platforms. Too much creates bright halos on edges, so check at full size.
Common Post-Processing Mistakes
These issues show up again and again in SFM shorts.
| Problem | Likely cause | Fix |
|---|---|---|
| Banding in skies and fog | Heavy grade on compressed frames | Grade PNG or TGA frames and add light grain |
| Washed out, hazy image | Bloom threshold too low or strength too high | Raise threshold and lower strength |
| Shots do not match | Graded each shot separately with no reference | Correct all shots to one reference first |
| Dark halos around characters | Strong ambient occlusion against the sky | Lower the effect or brighten the background fill |
| Bloom missing from posters | Poster exporter skipped viewport effects | Add bloom in post, as covered in our SFM poster tutorial |
| Clipped white faces | Overexposed source frames | Lower lights or toneMapScale and render again |
Frequently Asked Questions
Does SFM have built-in color correction?
The SFM viewport can show some post effects, but the high quality exporters do not always carry them through. For reliable results, render a clean image sequence and do color correction in a grading tool such as DaVinci Resolve, Blender or GIMP.
How do I turn on ambient occlusion in SFM?
Right-click the viewport, open Render Settings and enable ambient occlusion. Check the same setting in the export dialog, raise depth of field samples for a cleaner result, and keep it off while you light and animate to keep the preview fast.
Should I add bloom in SFM or in post?
In post is usually better. Grading tools give you direct control over threshold, size and strength, and you can change the bloom later without rendering again. Keep it subtle and limit it to true light sources.
What format should I export for color grading?
Export a PNG or TGA image sequence. These formats avoid lossy compression, so colors hold up when you push the grade. Encode the final MP4 only after grading.
Why does my graded SFM video show banding?
Banding appears when smooth gradients are stretched by a strong grade, especially on compressed frames. Grade from PNG or TGA frames, make gentler adjustments and add a light film grain before encoding.
What is the difference between color correction and color grading?
Color correction makes shots accurate and consistent by fixing exposure, contrast and white balance. Color grading comes after and adds a creative look, such as warm highlights and cool shadows, across the whole scene.
Final Thoughts
Build it in SFM, finish it in post
Strong SFM post-processing starts with a strong render. Light the scene well, control exposure with toneMapScale and use ambient occlusion for grounded contact shadows. Export a clean image sequence, correct every shot to a neutral base, then grade, add a careful bloom and finish with a touch of vignette and grain. Follow that order and your shots will look polished and consistent from the first frame to the last.
For More information, you can head to our SFMCompile Homepage