
Quick Answer
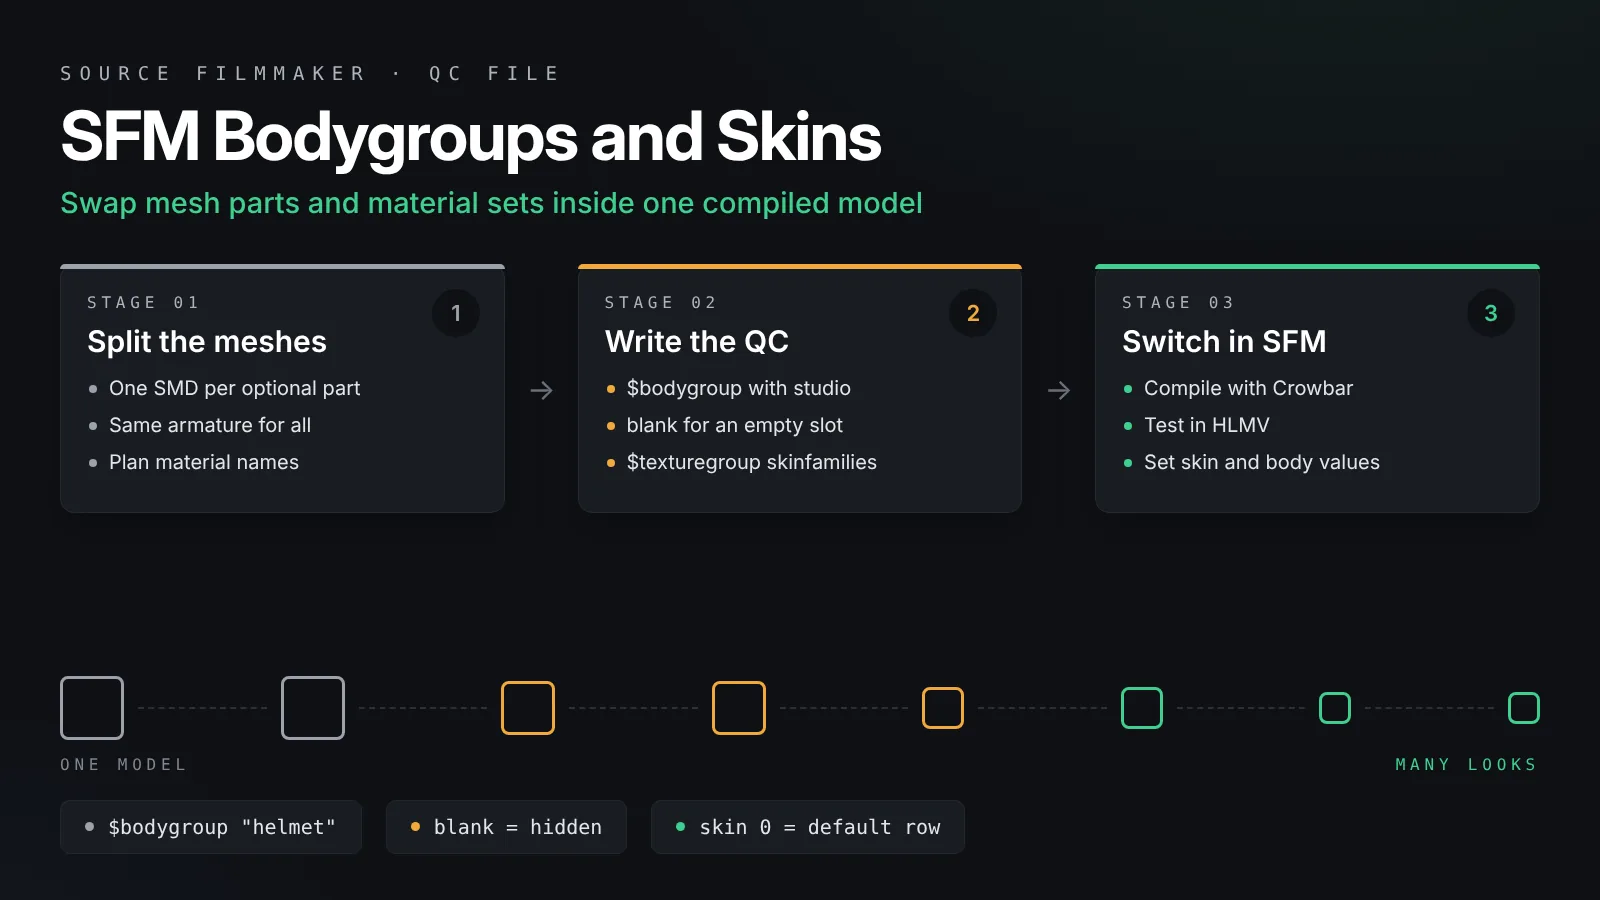
SFM bodygroups and skins let one compiled model hold several variations. Bodygroups swap whole mesh parts with a $bodygroup block in the QC file, and skins swap materials with a $texturegroup "skinfamilies" block. Compile with Crowbar, test in HLMV, then change the body and skin values in SFM's Element Viewer.
A single SFM model can hold several outfits, helmets, weapons and color schemes. You do not need a separate model for each one. Source handles this with two QC features: bodygroups, which swap whole pieces of mesh in and out, and skins, which swap the materials painted on the mesh. This guide shows how to set up SFM bodygroups and skins in the QC file, how to compile and test them, and how to switch between them once the model is inside Source Filmmaker. If you have not compiled a model before, start with our SFM compile guide, then come back to add bodygroups and skins.
You only need a text editor, the meshes exported from Blender as SMD or DMX files, and a compiler such as Crowbar. Everything else is careful naming.
The short version:
Export each optional part, such as a helmet or a backpack, as its own SMD or DMX file.
Add a $bodygroup block for each set of parts, using studio lines for the options and blank for an empty slot.
Add a $texturegroup “skinfamilies” block with one row per skin and matching material names in each column.
Compile with Crowbar, test in HLMV, then change the skin and body values in SFM’s Element Viewer.
What Bodygroups and Skins Actually Do
Both features add variety to one compiled model, but they change different things.
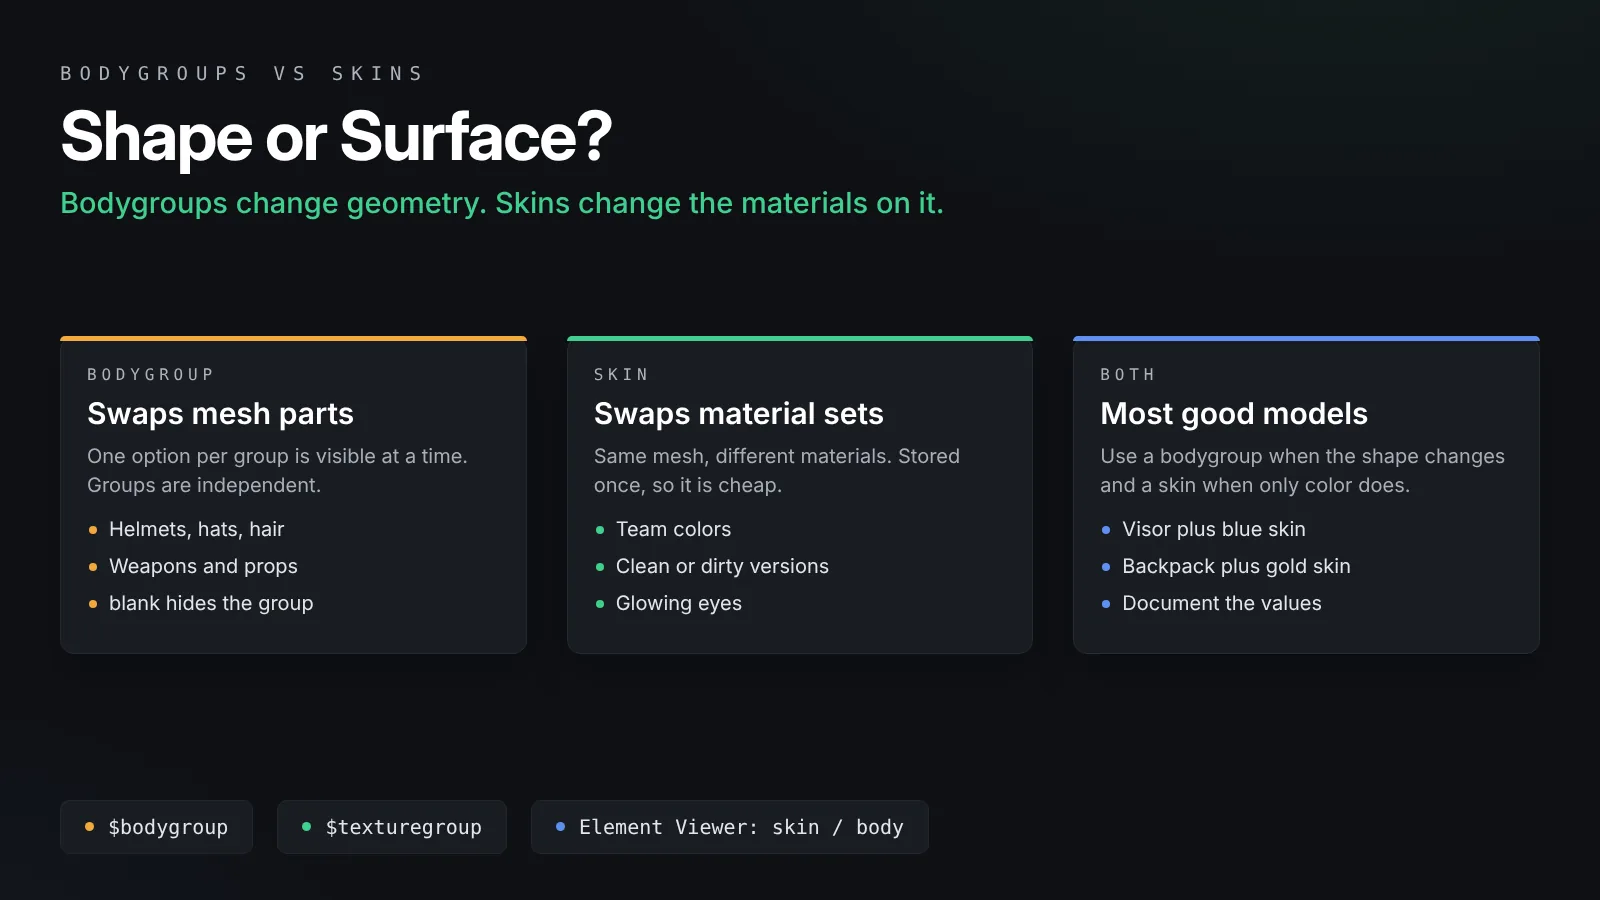
Bodygroups swap geometry
A bodygroup is a named slot that holds a list of mesh options. Only one option in each group shows at a time. A “helmet” group might hold a closed helmet, an open visor and an empty option. A “weapon” group might hold a rifle, a pistol and nothing. Every bodygroup is independent, so a character can wear the open visor and carry the pistol at the same time.
Skins swap materials
A skin keeps the mesh exactly as it is and changes which materials it uses. The classic example is a red team and blue team version of the same character. The shape is identical, but the body material points at a red texture in one skin and a blue texture in the other. Skins are cheap, because the model stores the mesh once.
When to use which
Use a bodygroup when the shape changes: hats, hair styles, armor, held items, damaged parts. Use a skin when only the color or surface changes: team colors, dirty and clean versions, glowing eyes. Many good SFM models use both. The table below sums it up.
| Goal | Feature | QC command |
|---|---|---|
| Add or remove a hat, mask or prop | Bodygroup | $bodygroup |
| Swap one outfit mesh for another | Bodygroup | $bodygroup |
| Change team colors or paint jobs | Skin | $texturegroup |
| Show a wet, dirty or damaged texture | Skin | $texturegroup |
| Hide a part completely | Bodygroup with blank | $bodygroup |
Prepare Your Meshes Before Writing the QC
Clean exports save hours of confusing compile errors later.
Split optional parts into separate files
In Blender, move each optional part into its own object, then export it as its own SMD or DMX. A typical set looks like robot_body.smd, helmet_closed.smd, helmet_visor.smd and backpack.smd. Keep the main body as one file that is always visible. Every file must use the same armature, or the parts will not follow the skeleton.
Keep every part weighted to the same skeleton
A helmet must be weighted to the head bone, and a backpack to a spine bone. If a part has no weights, it stays frozen at the origin when you pose the model. Our Blender to SFM porting guide covers armature setup and Blender Source Tools exports in detail.
Name materials with skins in mind
Skins work by material name, so plan names now. Give each part that will change color its own material, such as robot_red. Parts that never change, such as the eyes, should use a separate material, such as robot_eyes. Keep names short, lowercase and free of spaces.
Writing the $bodygroup Block
Each $bodygroup block names a group and lists its options in order.
Basic syntax
Here is a model with a fixed body, a helmet group and a backpack group:
$modelname "robot\robot.mdl"
$cdmaterials "models\robot\"

$body "body" "robot_body.smd"

$bodygroup "helmet"
{
	studio "helmet_closed.smd"
	studio "helmet_visor.smd"
	blank
}

$bodygroup "backpack"
{
	blank
	studio "backpack.smd"
}
Each studio line points at one mesh file. The word blank adds an empty option, which hides the group entirely. The first option in each group is the default, so the helmet starts closed and the backpack starts hidden.
Order matters
Options are numbered from zero in the order you write them. In the helmet group, helmet_closed is 0, helmet_visor is 1 and blank is 2. The groups themselves are also numbered in the order they appear, starting with the $body line. That order decides the body value you will use in SFM, so avoid shuffling groups after you share the model.
$body, $model and facial flexes
The $body line adds a fixed group with a single option. You can also use $model for the main body. Use $model when the mesh carries shape keys for facial flexes, because a $model block can define flex controllers and a plain studio option cannot. Keep the head inside $model and put hats, hair and props in bodygroups. The Valve Developer Community $bodygroup page lists every option the command accepts.
Writing the $texturegroup Block for Skins
Skins live in one block called skinfamilies.
Basic syntax
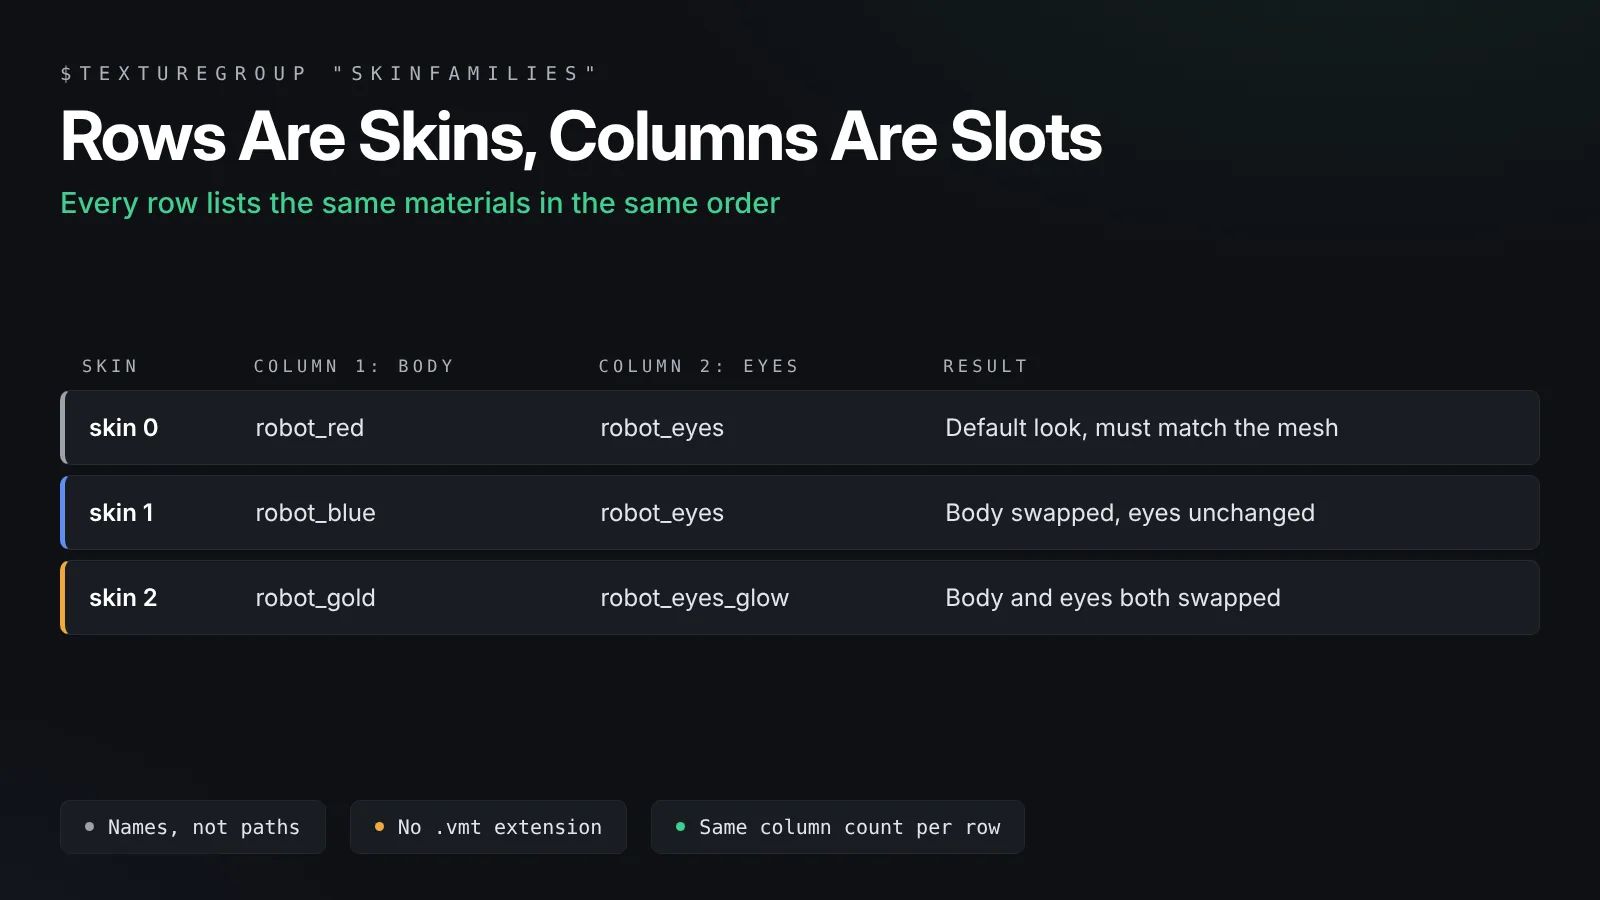
Each row is one skin. Each column is one material slot:
$texturegroup "skinfamilies"
{
	{ "robot_red"   "robot_eyes"      }
	{ "robot_blue"  "robot_eyes"      }
	{ "robot_gold"  "robot_eyes_glow" }
}
Row zero is the default skin. Its names must match the materials the meshes actually use. Row one replaces robot_red with robot_blue, and row two swaps both the body and the eyes.
Material names, not paths
The entries are material names, the same names you gave the materials in Blender. Do not add a folder or a .vmt extension. The compiler looks for each name inside the folders listed by $cdmaterials. So robot_blue becomes materials\models\robot\robot_blue.vmt when SFM loads it.
Every row needs the same column count
Each row must list the same number of materials, in the same order. If one row has three entries and another has two, the compile can fail or the wrong slot changes. Only list materials that actually change. If the eyes never change, you can drop them from every row and let them keep their original material.
Create the extra materials
For each new name, make a VMT and a VTF. The quickest route is to copy the default VMT, rename it and change its $basetexture line. Our VTFEdit tutorial shows how to convert recolored images into VTF files and write the matching VMT.
Compiling and Testing the Model
Once the QC is ready, compile it and check every option before opening SFM.
Compile with Crowbar
Open Crowbar, go to the Compile tab, select your QC and set the game to Source Filmmaker. Click Compile and read the log. Errors about missing files usually mean a studio line has the wrong file name. Our Crowbar tutorial walks through the compile settings and output folders.
Test bodygroups and skins in HLMV
Open the compiled model in Half-Life Model Viewer. On the Model tab, the Skin list shows every skin you defined. On the Body tab, pick each group from the Body Part list and step through its submodels. Check that each part sits in the right place and that nothing vanishes by mistake.
Common compile mistakes
Most problems come from a short list:
- A missing brace in a $bodygroup or $texturegroup block, which stops the compile.
- A mesh file name in a studio line that does not match the exported file.
- A material name in the skin table that the mesh never uses, so that column does nothing.
- An extra skin material that has no VMT, which shows as a purple checkerboard.
If you see the checkerboard, our SFM missing textures fix goes through path checks step by step.
Switching Bodygroups and Skins in SFM
SFM stores the skin and bodygroup choice on the model element itself.
Open the model in the Element Viewer
Load the model into a shot. In the Animation Set Editor, right-click its animation set and choose Show in Element Viewer, then Model. The Element Viewer lists the model’s attributes. Look for the values named skin and body.
Change the skin
Set skin to the row number you want. Zero is the first row in your $texturegroup, one is the second, and so on. The viewport updates as soon as you press Enter.
Work out the body value
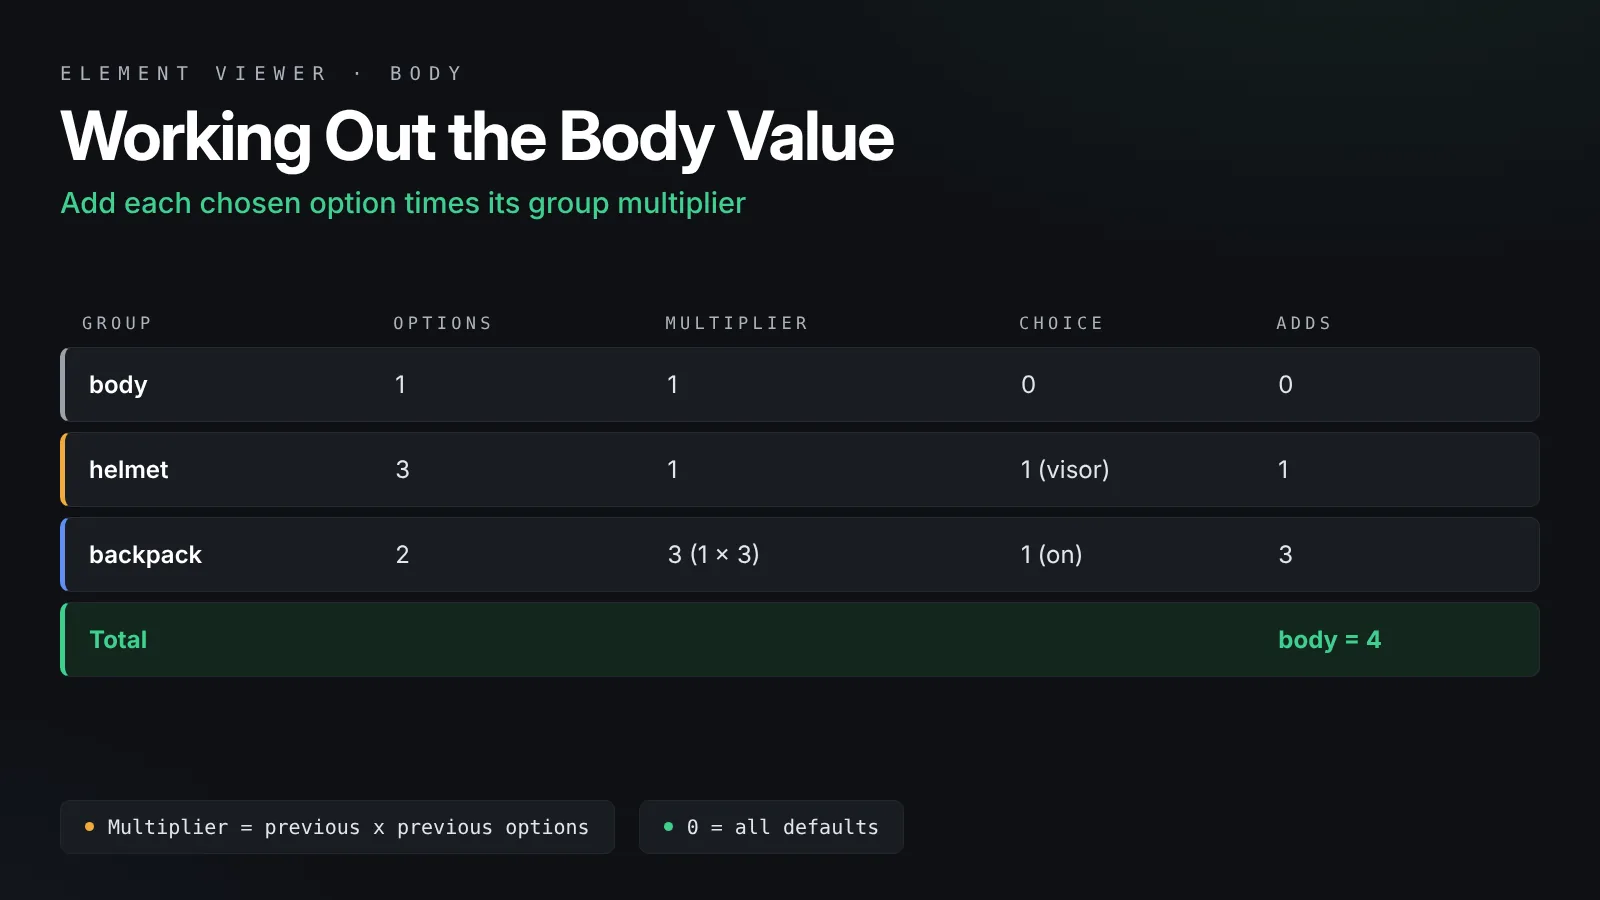
The body value packs every bodygroup choice into one number. Each group has a multiplier. The first group’s multiplier is 1. Each later group’s multiplier is the previous multiplier times the number of options in the previous group. Add up each chosen option times its group’s multiplier.
| Group (in QC order) | Options | Multiplier | Example choice | Adds |
|---|---|---|---|---|
| body | 1 | 1 | 0 | 0 |
| helmet | 3 | 1 | 1 (visor) | 1 |
| backpack | 2 | 3 | 1 (backpack on) | 3 |
| Total body value | | | | 4 |
So a body value of 4 shows the visor and the backpack. A value of 0 shows the default for every group. Writing this table down once saves a lot of guessing.
Changing options during a shot
The skin and body values apply to the whole shot, not to single frames. If a character needs to put on a helmet mid scene, split it into two shots and change the value in the second one. Another option is to load the model twice with different values and hide one copy at the right moment. Plan these switches before you animate, because retiming cuts later is slow.
Tips for Clean, Reusable Models
A few habits make your models easier for other people to use.
Use clear group names
SFM users see your names in the Element Viewer. “helmet” and “backpack” are better than “bg1” and “bg2”. Add a short readme listing each group, its options and a few useful body values.
Keep a default that looks complete
The first option in each group and the first skin should give a sensible look. Many users never change the defaults, so make that version the one you would want in a poster.
Watch the material count
Every unique material in every skin adds a texture to memory. A dozen skins at 4K each can slow SFM down on modest PCs. Reuse shared textures, such as eyes and teeth, across skins. When you publish the model, our guide to importing SFM models from the Steam Workshop shows the folder layout people will expect.
Frequently Asked Questions
How many bodygroups can an SFM model have?
There is no small practical limit for normal models. Most characters use between two and ten groups. The real limits are file size and the time it takes users to work out the body value, so group parts sensibly and document them.
Why does my new skin show the default texture in SFM?
Usually the material name in the $texturegroup row does not match the material the mesh uses, so nothing gets replaced. Check that row zero lists the exact names from your export, and that the new VMT sits in the folder set by $cdmaterials.
Can a bodygroup option have its own skin?
Skins apply to the whole model, not to one group. If a bodygroup part uses a material listed in the $texturegroup block, it changes with the skin like everything else. Give a part its own material if you want it to change independently.
What does blank do in a $bodygroup?
The blank keyword adds an empty option to the group. Selecting it hides that group completely, which is how you make hats, props and accessories removable.
Can I add skins to a model without recompiling it?
No. The skin table is stored inside the compiled MDL file. To add skins, decompile the model with Crowbar, add rows to the $texturegroup block in the QC, create the new materials and compile again.
Where do I change the bodygroup in SFM?
Right-click the model’s animation set, choose Show in Element Viewer, then Model, and edit the body value. Each group’s choice is packed into that one number, so use the multiplier method to work out the value you need.
Final Thoughts
Plan the slots first, then write the QC
SFM bodygroups and skins are simple once the pattern is clear. Split optional parts into their own files, list them in $bodygroup blocks with blank for empty slots, and build a skin table where every row has matching columns. Compile, test each option in HLMV, then set the skin and body values in SFM. Write down your body values once, and anyone who uses the model will be able to dress it in seconds.