
Quick Answer
The SFM Clip Editor is the timeline mode where you build the edit of your film. It shows the sequence as a row of shots with sound tracks underneath. You blade a shot with B, open a gap with Ctrl and drag, fill it with a new clip from the right-click menu, and double-click a shot to work inside it.
The SFM Clip Editor is the part of Source Filmmaker that turns a pile of animated moments into an actual film. Animation happens shot by shot, but the order, length and rhythm of those shots is decided here. If you have ever finished a great pose and then wondered how to cut to a second camera angle, the answer lives in this editor.
This guide explains how the Clip Editor is organized, how sessions, sequences and shots relate to each other, and the handful of moves you need to cut, trim and arrange a film. It also covers sound tracks and the problems that trip up most new editors. The shortcuts and menu names follow the default bindings described in Valve’s documentation.
The short version:
Switch the timeline to the Clip Editor.
Use the mode buttons at the top left of the timeline, or press Tab to toggle from the animation editors.
Blade shots at the cut points.
Park the playhead on the frame and press B to split the shot into two independent shots.
Open gaps and add new shots.
Ctrl and drag a shot to open space, then right-click the gap and choose Replace Gap with New Clip.
Trim, review and add sound.
Drag shot edges to set length, press Ctrl+Spacebar to review a shot, and place audio on the sound tracks.
What the SFM Clip Editor Does
Source Filmmaker’s timeline panel has three modes: the Clip Editor, the Motion Editor and the Graph Editor. They share the same space at the bottom of the window, and you switch between them with the buttons in the upper-left corner of the timeline. The Clip Editor is the one that looks most like a traditional video editor.
Where the Clip Editor sits in the timeline
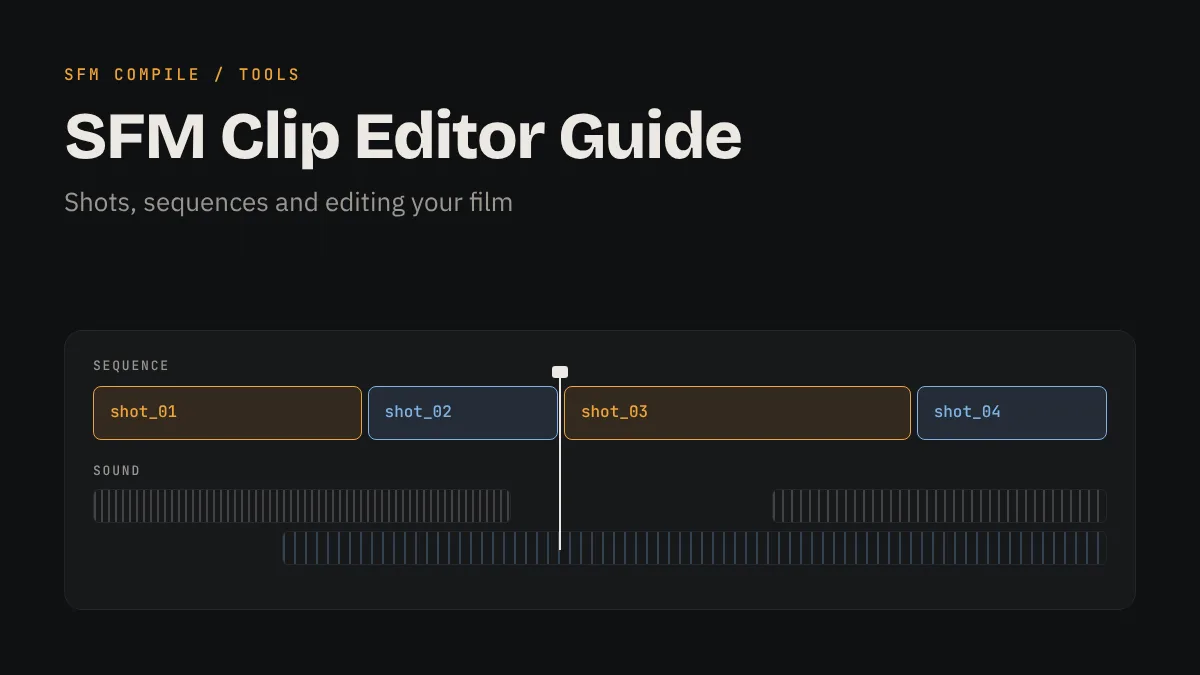
In Clip Editor mode, the timeline shows a film track across the top with each shot drawn as a block, and sound tracks below it for dialog, music and effects. The playhead runs through all of them, so you always see which shot and which audio clip are active at the current frame. Spacebar plays the whole sequence from the playhead, and the Up and Down Arrow keys jump to the previous or next shot.
How it differs from the Motion and Graph Editors
The Clip Editor edits time and structure, not poses. You can select controls in the Animation Set Editor while you are in it, but you cannot change them there. Any posing or keyframing happens in the Motion Editor or the Graph Editor, which our guide to the SFM Motion Editor and Graph Editor covers in depth. Press Tab to flip between the Clip Editor and whichever animation editor you used last.
| Timeline mode | Main job | Changes animation | Typical task |
|---|---|---|---|
| Clip Editor | Shots, sound and effects clips | No | Cutting, trimming and ordering the film |
| Motion Editor | Blending poses over a time selection | Yes | Body motion, blocking, lip sync cleanup |
| Graph Editor | Keyframes and curve shapes | Yes | Precise timing and camera moves |
Sessions, Sequences and Shots Explained
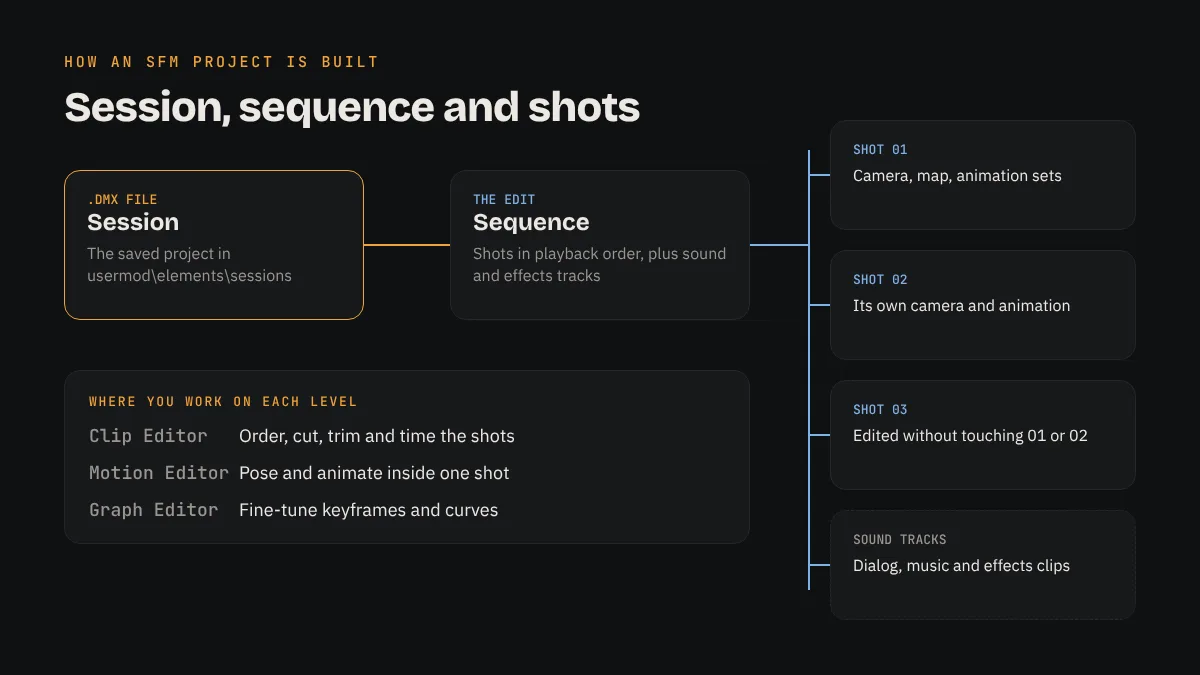
Most confusion in the Clip Editor comes from not knowing which level of the project you are looking at. Source Filmmaker stacks three containers inside each other, and every edit you make belongs to one of them.
The session is the saved file
A session is your project file, saved as a .dmx file in SourceFilmmaker\game\usermod\elements\sessions by default. When you choose File and then New, SFM creates a session that already contains one sequence with a single shot. Saving with Ctrl+S writes every shot, camera, light and sound clip in the project to that one file.
The sequence is your edit
The sequence is the top level you see in the Clip Editor: shots in playback order on the film track, with sound clips arranged on the tracks below. Think of it as the finished cut. When you render a movie, SFM plays through the sequence from start to end and records what each shot’s camera sees.
Shots are self-contained scenes
Each shot carries its own camera, its own map reference and its own animation sets for models, lights and particles. That independence is the point. You can animate a character one way in a wide shot and differently in a close-up without the two interfering. It also means a change in one shot does not automatically appear in the next, which surprises many beginners.
Sequence time versus shot time
Shots keep their own internal clock. When you double-click a shot to open it, the timeline shows that shot’s local time, and the up arrow at the top left of the timeline takes you back to the sequence. In the Element Viewer, a shot’s time frame data includes values such as start, duration, offset and scale, which is how SFM maps shot time onto the sequence.
Creating and Arranging Shots
Building a film in the SFM Clip Editor comes down to three moves: blade, gap and fill. Once they are automatic, you can rough out the structure of a short in a few minutes, long before you animate anything in detail.
Blade a shot with B
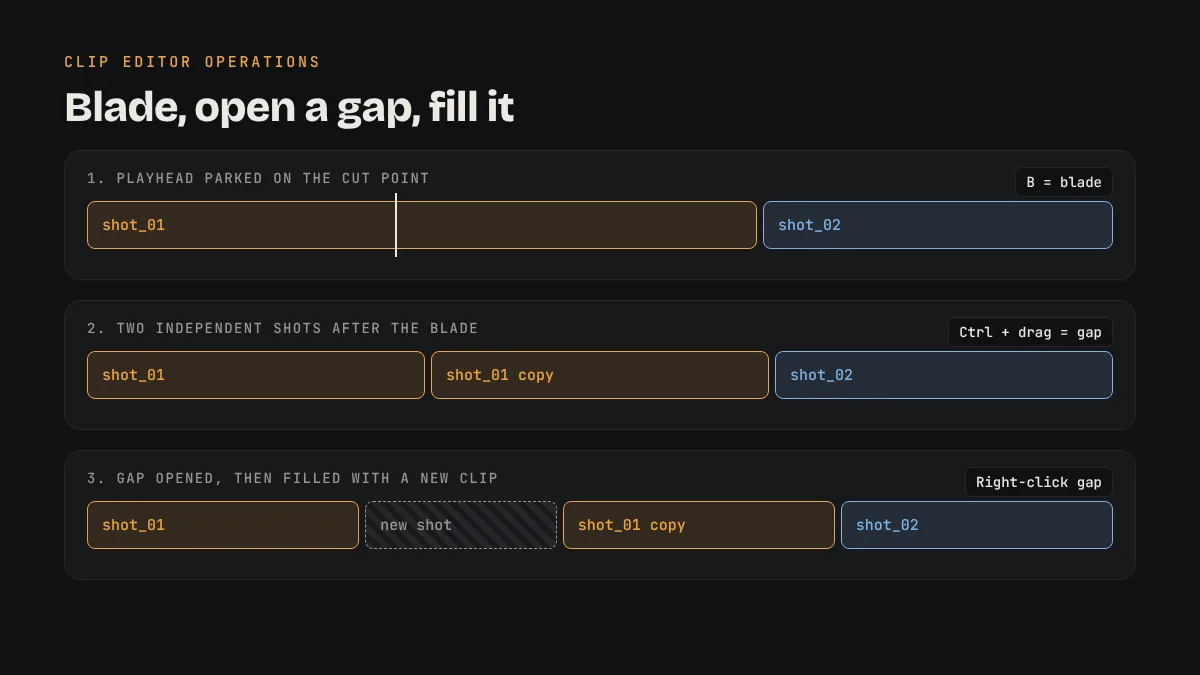
Move the playhead to the frame where you want the cut and press B. SFM splits the shot into two shots at that point. Each half is an independent copy with the same camera, models and animation, so you can now change the camera on the second half to create a new angle while the first half stays as it was.
Open a gap and fill it with a new clip
To insert a shot between two existing ones, hold Ctrl and drag the later shot to the right. This opens an empty black gap on the film track. Right-click the gap and choose Replace Gap with New Clip. SFM fills the space with an empty shot that copies the camera, ready for you to add models and set up the scene.
Copy, paste and delete shots
Ctrl+C, Ctrl+V and Del work on selected shots and clips, just as they do elsewhere in the program. Copying a shot is a quick way to reuse a lit set for a reaction shot. Delete removes the selected shot from the sequence, so save first if you are not sure, and remember that Ctrl+Z undoes and Ctrl+Shift+Z redoes.
Give each shot one clear camera
Because each shot has its own scene camera, the cleanest workflow is one framing idea per shot. Block in a wide, then blade and reframe for a medium and a close-up. For lens choices, depth of field and movement, our SFM camera tips guide goes further. Keep in mind that the work camera you fly around with is only for viewing; the render uses the shot’s scene camera.
Trimming, Timing and Reviewing the Edit
Once the shots are in order, the real editing starts: deciding how long each one holds and where each cut lands. Small timing changes in the Clip Editor often improve a film more than extra animation polish.
Drag shot edges to set length
Hover over the start or end edge of a shot on the film track and drag to make it shorter or longer. Trimming changes which part of the shot’s internal time plays in the sequence; it does not delete the animation underneath. If you trim too far, drag the edge back out and the frames return. Zoom the timeline with the mouse wheel when you need frame-level precision.
Review one shot or the whole cut
Ctrl+Spacebar plays only the current shot and returns time to the playhead when it finishes, which is ideal for checking a single cut. Spacebar plays the full sequence. Home and End jump to the start and end of the filmstrip, and the Left and Right Arrow keys step one frame at a time. Mouse wheel zoom around the playhead helps when two cuts sit close together.
Plan cuts before detailed animation
Rough out the edit with simple poses first, then animate. Blading a shot duplicates its animation, so if you polish a long take and then cut it into five shots, any later fix has to be made in all five. Locking the edit early saves that repeated work and keeps the cuts consistent.
- Block the story with a few placeholder poses in one long shot.
- Blade at the planned cut points and reframe each new shot’s camera.
- Trim shot lengths until the rough cut plays well with the audio.
- Only then open each shot and do the detailed animation.
Sound and Effects Tracks in the Clip Editor
Audio lives in the Clip Editor too, on the sound tracks below the film track. Dialog, music and sound effects each get their own track by default, so you can move a music bed without disturbing a line of dialog.
Adding audio clips to a track
Right-click a track in the sound group and choose Add Clip to Track, then pick a WAV file from your sound folder. SFM is strict about format: 16-bit PCM WAV at 44.1 kHz is the safe choice. Our guide on how to add and sync sound in SFM covers conversion, folder setup and waveform display step by step.
Keeping sound in sync after edits
Sound clips sit on the sequence timeline, not inside shots. If you trim a shot or open a gap, the shots after it move but the audio may not, so dialog can drift away from the mouth movement it belongs to. After every structural edit, play the affected section and nudge audio clips back into place. Lock the music and dialog timing first when the film is cut to audio.
Common Clip Editor Problems and Fixes
Most Clip Editor problems are not bugs. They come from working at the wrong level of the project or forgetting that shots are independent.
Controls will not move in the Clip Editor
This is expected. The Clip Editor does not modify animation, so dragging a slider or manipulator does nothing useful there. Press Tab or click the Motion Editor button, make your change, then switch back to continue editing.
A fix in one shot does not appear in another
After a blade, each shot holds its own copy of the animation and scene. Fixing a pose or a light in one does not update its neighbors. Either make the fix before you blade, or repeat it in every shot that shares the setup.
Black frames or missing footage in the render
An empty gap on the film track has no shot to render. Before exporting, scan the sequence for black gaps and either fill them with a new clip or close them by dragging the next shot back. Then follow our guide to render SFM to MP4 for the export settings.
Shortcuts like B or Tab do nothing
Keyboard shortcuts only fire in the panel that has focus. Click once on the timeline before pressing B, Tab or the arrow keys. If a key still does nothing, it may have been rebound, so compare against the default list in the Valve Developer Community page on the Clip Editor.
Frequently Asked Questions
What is the Clip Editor in SFM?
It is one of the three timeline modes in Source Filmmaker. It shows your sequence as shots on a film track with sound tracks below, and it is where you cut, trim, order and time shots. It does not change animation.
How do I switch to the Clip Editor?
Click the Clip Editor button in the upper-left corner of the timeline. Pressing Tab toggles between the Clip Editor and the last animation editor you used.
How do I split a shot in SFM?
Place the playhead on the frame where you want the cut, click the timeline so it has focus, and press B. The shot becomes two independent shots that you can reframe separately.
How do I add a new shot between two shots?
Hold Ctrl and drag the later shot to the right to open a gap. Right-click the gap and choose Replace Gap with New Clip to fill it with an empty shot that copies the camera.
How do I go inside a shot and back out?
Double-click a shot to open it and see its local timeline. Click the up arrow at the top left of the timeline to return to the sequence view.
Why did my audio drift after I trimmed a shot?
Sound clips live on the sequence tracks, separate from shots. Trimming or moving shots can shift the picture without moving the audio, so replay the section and drag the sound clips back into sync.
Final Thoughts
Edit like a filmmaker, then animate
The SFM Clip Editor is small, but it shapes how your film feels more than any single pose. Learn the blade, gap and fill moves, keep each shot to one clear camera idea, and lock your cut before you polish animation. Check sound sync after every structural change and close any gaps before export. With those habits, the Clip Editor stops being a confusing strip of blocks and becomes the place where your film comes together.