
Quick Answer
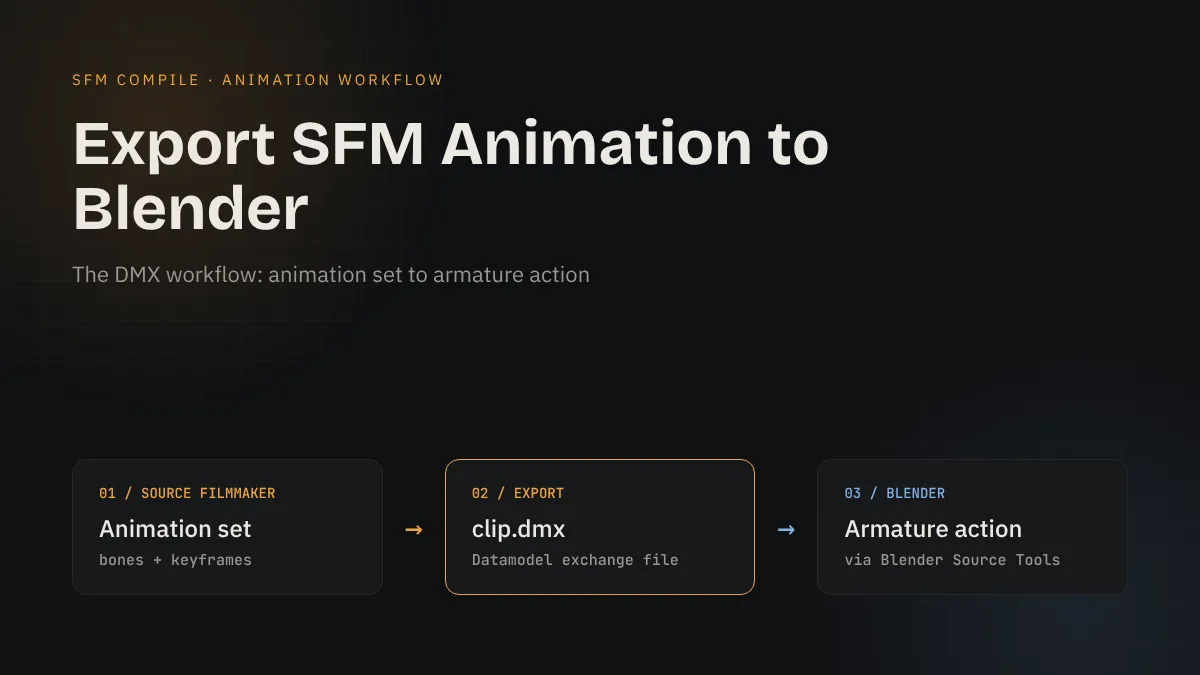
To export SFM animation to Blender, bake any IK or physics motion first, then right-click the animation set in Source Filmmaker and export its animation as a DMX file. In Blender, import the same model so the skeleton matches, select its armature, and import the DMX with Blender Source Tools. Finally, match the frame rate and clean up the action.
Source Filmmaker is a fast place to block out character motion, but sooner or later many animators want that motion somewhere else. Blender offers modern rendering with Cycles and EEVEE, proper compositing, and a far bigger toolset for cleanup. The good news is that you do not have to re-animate a shot from scratch. SFM can write an animation set’s keyframes into a DMX file, and Blender can read that file onto a matching armature.
This guide walks through the full DMX workflow: preparing the shot in SFM, exporting the animation, rebuilding the same skeleton in Blender, importing the motion, and fixing the problems that usually appear on the first attempt. It assumes you already have SFM installed and a Blender version that works with the current Blender Source Tools release.
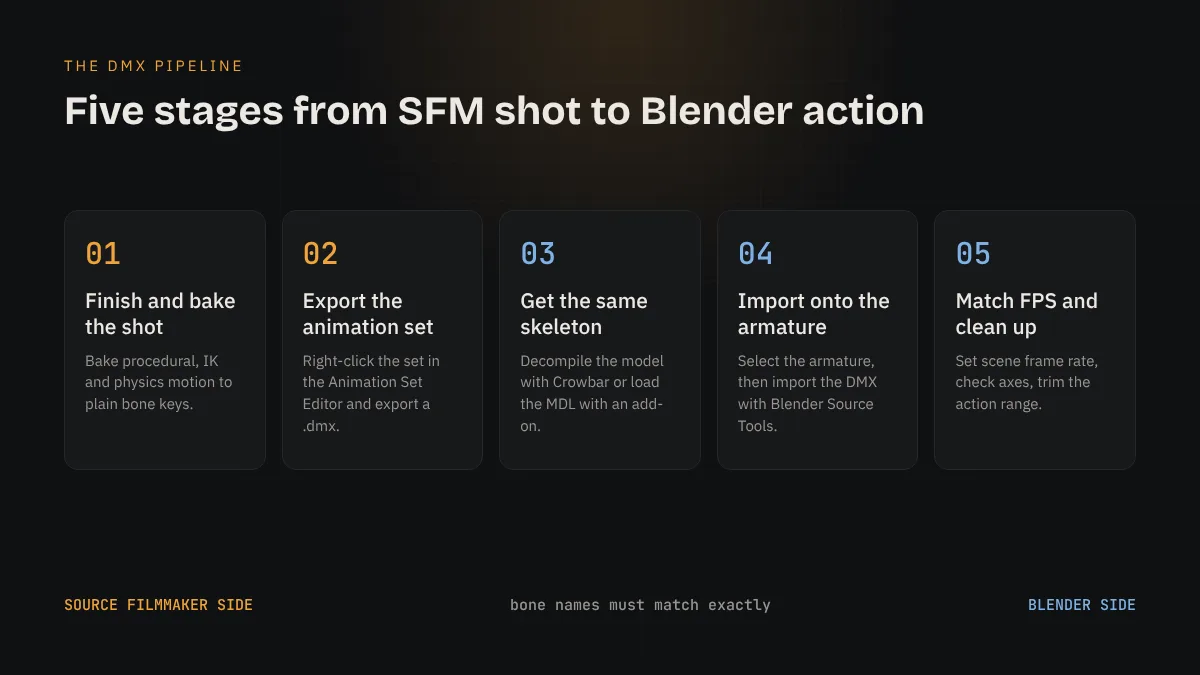
Bake procedural motion in SFM.
Turn IK, rig constraints and physics into plain bone keys.
Export the animation set as a DMX.
One file per character or prop you want to move.
Load the identical skeleton in Blender.
Decompile the model or import the MDL with an add-on.
Import the DMX onto the selected armature.
Blender Source Tools creates an action from the keys.
Match frame rate and clean up.
Fix scale, axis and timing, then render.
How the DMX Workflow Works
What a DMX File Actually Contains
DMX is Valve’s Datamodel Exchange format. SFM uses it for session files, and it can also hold a standalone animation clip. When you export an animation set, the file stores channels of transform data: a position and rotation value for each bone over time, plus related controls. It does not contain the model’s mesh, textures or materials. Think of it as a list of instructions that say “move this named bone here at this frame.”
Why the Skeleton Must Match
Because the DMX only stores bone names and transforms, Blender needs an armature with the same bone names and a compatible hierarchy to apply them to. If you import the motion onto a different rig, the importer has nothing to attach the keys to, or it attaches them to the wrong bones. The safest approach is always to bring the exact model you animated in SFM into Blender, not a lookalike from another source.
Tools You Need Before You Start
- Source Filmmaker with your finished or blocked-out shot.
- Blender, a version supported by the Blender Source Tools add-on you install.
- Blender Source Tools, which adds Source Engine import options for SMD, VTA, DMX and QC files.
- Crowbar, or a direct MDL importer add-on, to get the model itself into Blender.
Step 1: Prepare the Shot in Source Filmmaker
Bake IK, Rigs and Physics Into Bone Keys
A lot of SFM motion is not stored on the bones directly. IK rigs, constraint-driven parts and simulated physics produce motion that SFM evaluates at playback time. If you export without baking, Blender may receive the raw control values instead of the final pose, and limbs or hair can end up frozen or misaligned. Before exporting, bake those systems down to keyframes on the actual bones. Our SFM physics guide covers baking simulated bones step by step.
Trim the Shot and Note the Frame Rate
Set the shot’s time range so it covers only the frames you need. A tight range keeps the exported file smaller and makes the Blender timeline easier to manage. Also write down the frame rate your session uses. SFM sessions commonly run at 24 frames per second, but many projects use 30 or 60, and you will need to set the same value in Blender later.
Save a Backup Session First
Baking is destructive in the sense that it replaces live rig behavior with flat keys. Save the session under a new name before you bake, so you can return to the editable version if you need to change the animation later.
Step 2: Export the Animation Set as a DMX
Use the Animation Set Context Menu
In the Animation Set Editor, right-click the animation set for the character you want to move. The context menu includes an export option for animation. Choose it, pick a folder outside your game directories, and save the file with a clear name such as character_walk_shot01.dmx. Exact wording of the menu can differ slightly between SFM builds, so look for the entry that mentions exporting animation rather than exporting the model.
Export One Set at a Time
Each animation set produces its own DMX. If the shot has three characters and a prop that moves, export four files. Keeping them separate makes the Blender side much simpler, because each file goes onto one armature. Name each file after the model it belongs to so you never apply a clip to the wrong rig.
Know What the Export Leaves Behind
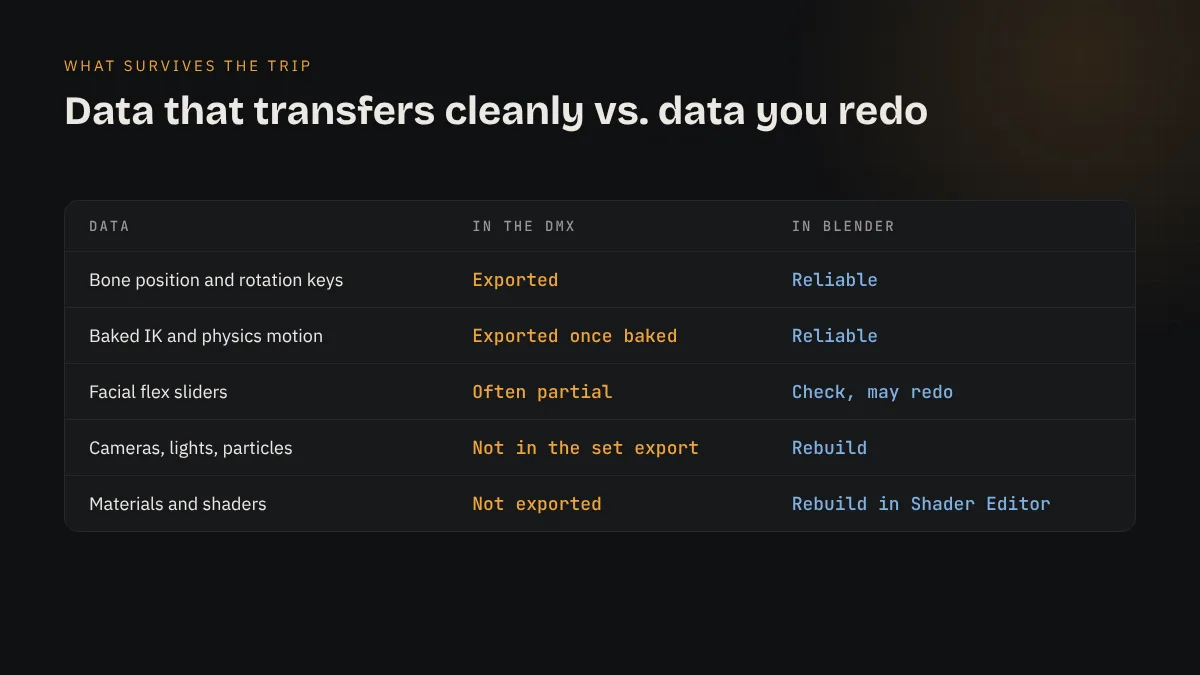
The animation export is focused on the set’s bone and control data. Cameras, lights, particle systems and materials are separate elements of the session and do not ride along in the clip. Plan to rebuild those in Blender, which is usually worth doing anyway because Blender’s lighting and shading work differently from the Source engine.
Step 3: Get the Same Model and Skeleton Into Blender
Option A: Decompile the Model With Crowbar
The classic route is to decompile the compiled MDL back into source files. Crowbar outputs the reference mesh as SMD or DMX along with a QC file. In Blender, use File, then Import, then the Source Engine option added by Blender Source Tools, and import the QC or the reference mesh. You get a mesh parented to an armature with the original bone names. Our Crowbar decompile tutorial shows the full process, including where to find the model files inside your SourceFilmmaker\game\usermod folder or Workshop downloads.
Option B: Import the MDL Directly With an Add-on
Community add-ons such as SourceIO can read Source engine MDL files straight into Blender, often with materials converted as well. This saves the decompile step. Whichever add-on you use, confirm that the bone names in the imported armature match the names SFM uses. Some importers rename or prefix bones, and a mismatch there is the most common reason an imported clip does nothing.
Check the Rest Pose Before Importing Motion
Open the armature in Pose Mode and clear all transforms. The model should stand in its reference pose with no stretched or twisted parts. If the rest pose already looks wrong, fix the model import first, because the animation will inherit every error in the skeleton.
Step 4: Import the DMX Animation in Blender
Select the Armature, Then Import
Click the armature object so it is active and selected. Then open File, Import, and the Source Engine importer from Blender Source Tools, and choose your exported DMX. When an armature is selected, the add-on applies the incoming animation to that existing skeleton instead of creating a new one. The Blender Source Tools help page on the Valve Developer Community describes the importer options, including how bones are matched and appended.
Find the New Action
The imported motion arrives as an action on the armature. Open the Dope Sheet, switch to the Action Editor, and you should see the clip listed with keys on each bone. Scrub the timeline to check that the character moves. If you exported several sets, repeat the import for each armature with its matching file.
Set the Frame Rate and Range
In Output Properties, set the scene frame rate to the same value your SFM session used. Then set the start and end frames to cover the action’s keyed range. If the rates do not match, the motion will play too fast or too slow even though every key is correct.
Troubleshooting Common Export Problems
Quick Reference Table
| Symptom in Blender | Likely Cause | Fix |
|---|---|---|
| Import completes but nothing moves | Bone names do not match, or no armature was selected | Select the correct armature and compare bone names with the SFM model |
| Character lies on its side | Up axis difference between Source and Blender | Rotate the armature object, or adjust the importer’s up axis setting |
| Limbs frozen or snapping | IK or rig motion was not baked | Bake in SFM and export again |
| Motion too fast or too slow | Frame rate mismatch | Set Blender’s scene frame rate to the SFM value |
| Model is tiny or huge | Unit scale difference | Scale the armature object, not individual bones |
| Face stays neutral | Flex data did not transfer fully | Animate shape keys in Blender or re-key the face |
Axis and Scale Issues
Source and Blender both use Z as the up axis by default, but models compiled or imported with different settings can still arrive rotated. Fix orientation at the object level by rotating the armature, so bone keys stay untouched. The same rule applies to scale: change the object scale and apply it before further work, never the bones themselves, or the imported motion will drift away from its intended poses.
Facial Animation and Flexes
SFM drives faces with flex controllers that map to shape keys on the mesh. Depending on the model and importer, this data may come through only partly. If the body moves but the face stays neutral, treat the face as a separate pass in Blender using the model’s shape keys. For dialogue shots, it can be faster to redo lip sync in Blender than to repair a partial transfer.
Polishing and Rendering the Shot in Blender
Clean Up Keys in the Graph Editor
Baked SFM motion usually has a key on every frame for every bone. That is accurate but heavy to edit. Blender’s Graph Editor can decimate keys to reduce the count while keeping the curve shape, which makes later tweaks far easier. Work on a duplicate action so the original import stays available as a reference.
Rebuild Materials, Lights and Camera
Source materials rely on VMT and VTF files, which Blender does not use natively. Convert the textures to PNG or TGA and set up Principled BSDF materials in the Shader Editor. Then add lights and a camera that match the framing you had in SFM. The Blender manual is the best reference for render settings in Cycles and EEVEE.
When to Stay in SFM Instead
Moving a shot to Blender is worth it for long projects, higher render quality or complex compositing. For quick clips with stock maps and lighting, staying in SFM is often faster. Our SFM vs Blender comparison breaks down when each tool makes more sense.
Frequently Asked Questions
Can I export an entire SFM session to Blender at once?
Not in a single clean step with standard tools. The reliable method is to export each animation set as its own DMX and import each one onto its matching armature. Cameras, lights and effects are rebuilt in Blender.
Do I need Blender Source Tools to import a DMX?
Blender does not read DMX files on its own, so you need an add-on. Blender Source Tools is the standard choice for DMX animation import and is maintained alongside the Source modding community.
Why does my imported animation not move the model?
Usually the armature was not selected during import, or the bone names in Blender differ from those in the SFM model. Import the exact same model you animated and select its armature before importing the DMX.
Can I export SFM animation as FBX instead?
SFM does not offer a native FBX export for animation. The common path is DMX into Blender first, and then Blender’s own FBX exporter if you need the motion in another program.
Will Workshop models work with this workflow?
Yes, as long as you can get the same model files into Blender. Workshop models install as compiled MDL files, which you can decompile with Crowbar or load with an MDL import add-on.
Does the workflow also work in reverse, from Blender to SFM?
Yes, but it is a different process. You export from Blender with Blender Source Tools and either compile the motion into a model or import it as an animation clip. Our Blender to SFM porting guide covers the model side of that route.
Final Thoughts
A Reliable Bridge Between Two Tools
Exporting SFM animation to Blender comes down to three rules: bake everything to bone keys, bring the identical skeleton into Blender, and match the frame rate. Follow those and the DMX workflow moves your body animation across with very little loss. Expect to rebuild faces, materials, lights and cameras on the Blender side, and treat that as a chance to push the shot further than the Source engine allows.